
OBS Live Streaming Tutorial: From Beginner to Advanced, Create Professional Live Streams
2024-06-12
Why Choose OBS for Live Streaming
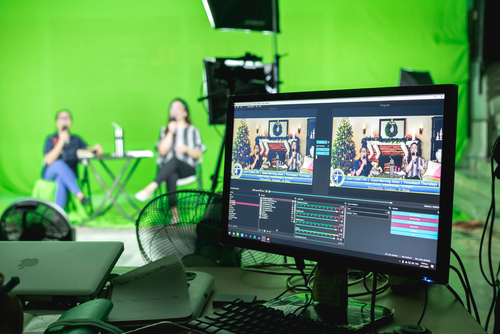
In today’s digital era, live streaming has become a key way to engage with audiences. Whether it's gaming, teaching, or online seminars, live streaming offers real-time interactive experiences. Open Broadcaster Software (OBS) is a free, powerful tool that many new streamers prefer. It supports multiple platforms, including Windows, Mac, and Linux, and offers extensive customization options, making it an ideal tool for live streaming.
You might wonder why use OBS when mobile apps can handle simple streaming. The main advantage of OBS lies in its highly flexible personalization features. You can quickly insert title cards, photos, and videos during your stream, making professional-quality broadcasts easy to achieve. Additionally, OBS enables you to stream to multiple social platforms like YouTube, Facebook, and others simultaneously with ease.
This article provides a step-by-step guide on how to set up a streaming scenario using a computer, slides, or any other application, making live streaming accessible to everyone.
OBS Live Streaming Hardware Preparation: Beginner and Basic Setup
This guide outlines two types of hardware setups: an entry-level setup for minimum requirements and a basic setup for standard streaming needs. It’s recommended to start with the entry-level setup for practice and move to the basic setup or a more complex configuration once you’re comfortable with the process.
Entry-level Configuration
- A PC: You need a PC with a basic camera and microphone, paired with OBS to start streaming. Note that live streaming requires real-time video processing, so the computer should be capable of handling these demands. Test your PC beforehand to ensure it can handle streaming smoothly.
Basic Configuration
To improve your streaming quality, consider the following setup for better video and audio effects, ensuring a more professional broadcast.
- Camera: As the main video source, you can use HDMI-supported recording devices like DV or digital cameras with a tripod to stabilize the camera position and quality.
- Microphone: The main audio recording equipment.
- Video Capture Card: Converts the camera signal into a signal that the computer can process.
- 1 to 2 PCs: Although a single PC can be used for entry-level streaming, more complex setups may require higher performance. Consider using one PC for video signal input and director editing, and another PC dedicated to live streaming output.
Getting to Know OBS: Installation, Interface, and Features Overview
Installation
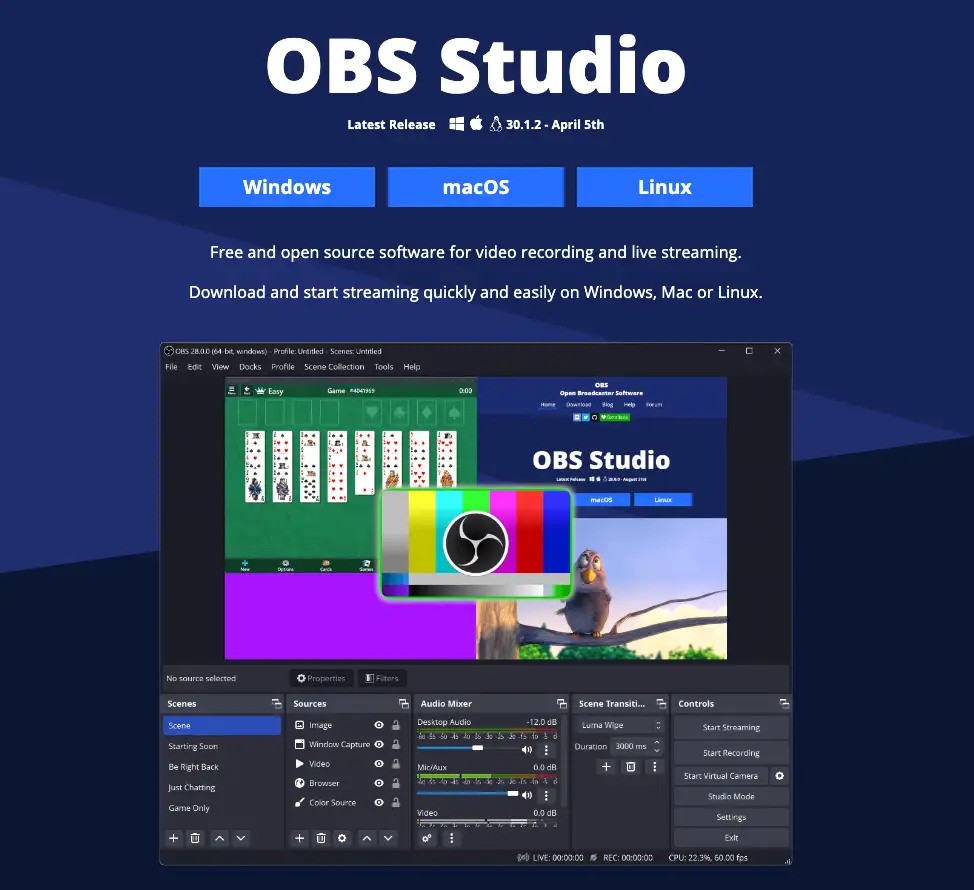
- OBS supports Windows, macOS, and Linux systems, and is completely free. Download the appropriate version from the OBS website and install it.
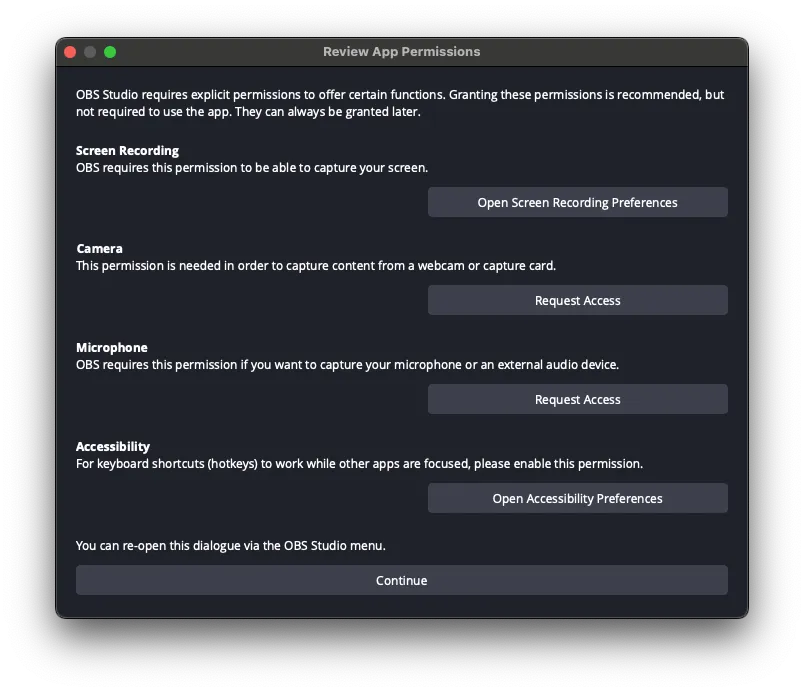
- Allow all necessary permissions for OBS. The method for granting permissions varies by operating system, so please follow the system instructions. After granting all permissions, reopen OBS.
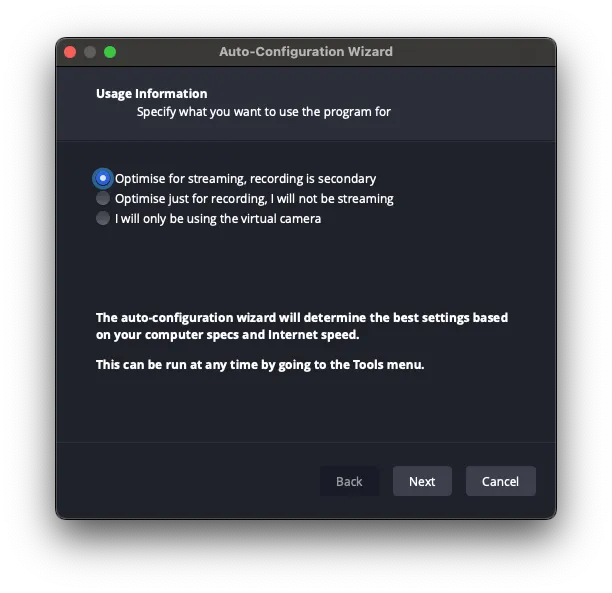
- The first time you open OBS, an automatic setup prompt will appear. Select "Cancel" and configure it later.
Interface and Function
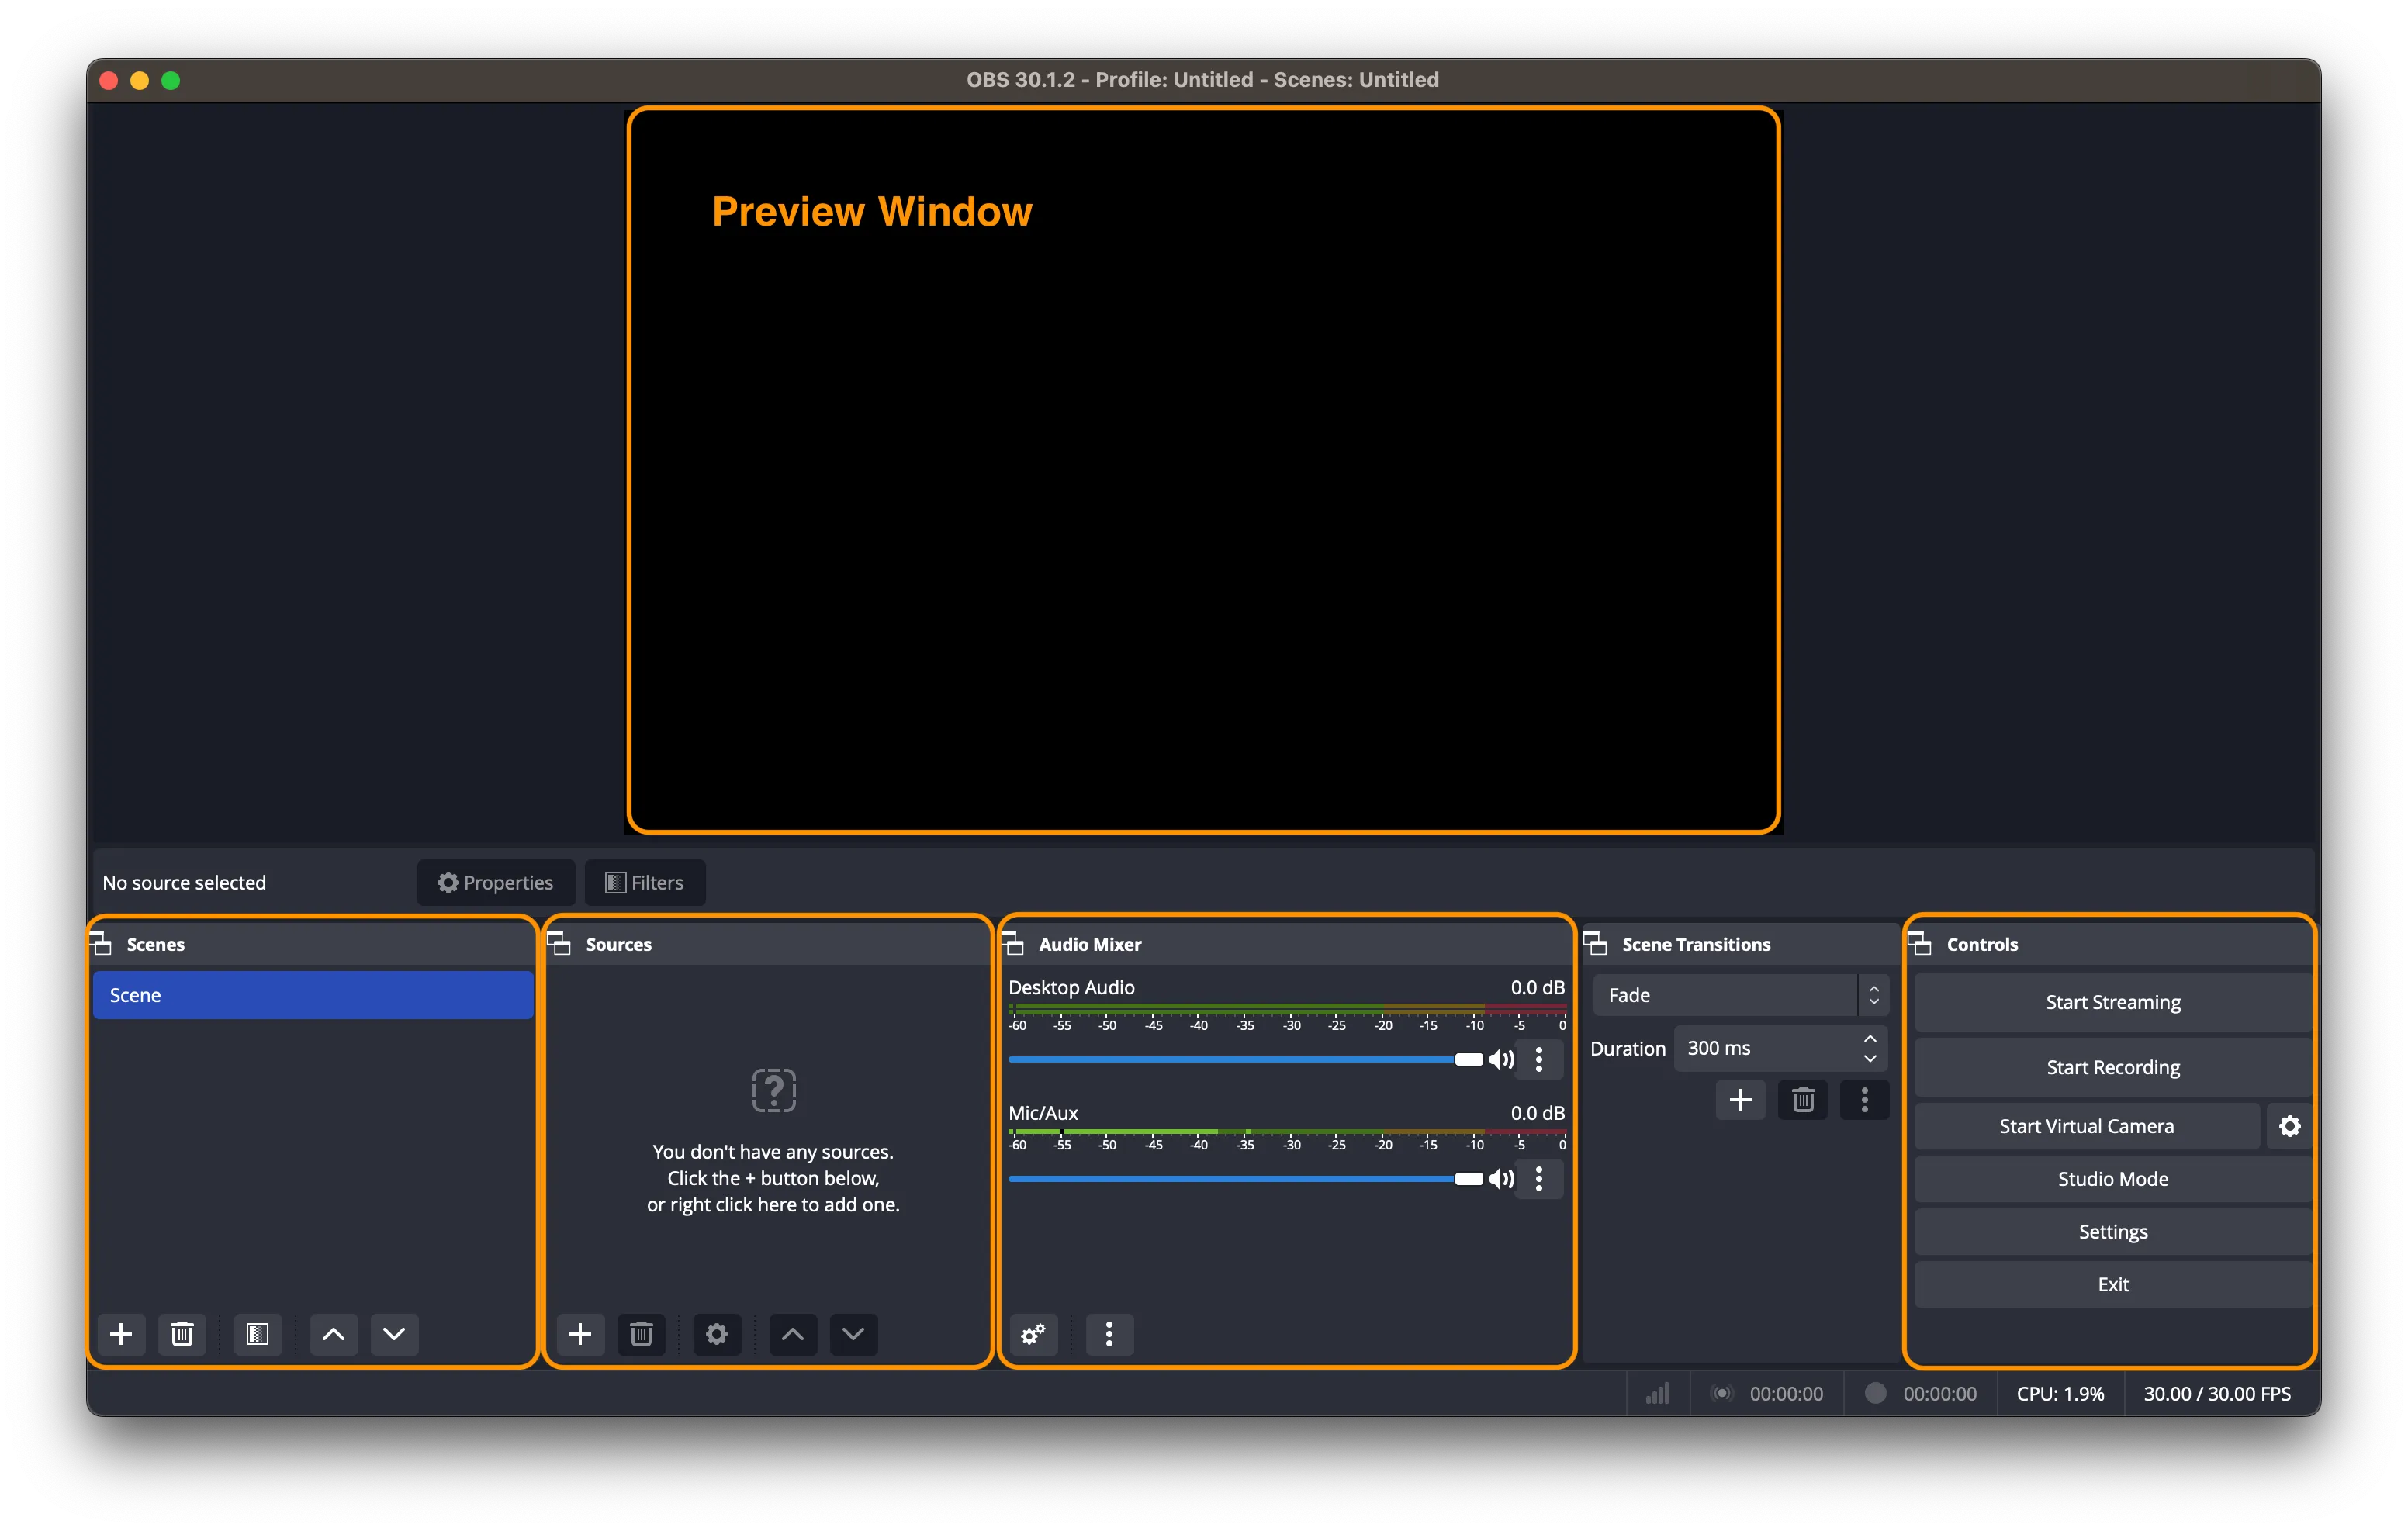
The OBS interface might seem intimidating at first, but it’s quite intuitive. The main interface consists of several parts: the preview window, scenes, sources, audio mixer, and control panel. Familiarizing yourself with these functions is the first step to mastering OBS. Here’s a brief overview of each panel:
- Preview Window: Previews the live broadcast screen.
- Scenes: Pre-set several scenes, such as transitions and main scenes, to switch quickly during the broadcast.
- Sources: Think of the preview window as a canvas and the sources as materials you can arrange on this canvas. Possible sources include your computer desktop, videos, images, and audio.
- Audio Mixer: Test each audio source, adjust volume, and mute as needed.
- Controls: Operate various settings, including starting and stopping the live broadcast.
Setting Up OBS: Step-by-Step First Setup and Configuration
Even if you’re unfamiliar with the above panels, just follow these steps to complete your first live stream. This section focuses on a single-PC setup with a presenter and slides. For more complex setups, use the same principles. We’ll release more related articles in the future.
— Setting Up the Live Broadcast Screen —
Step 1: Set up the Scene
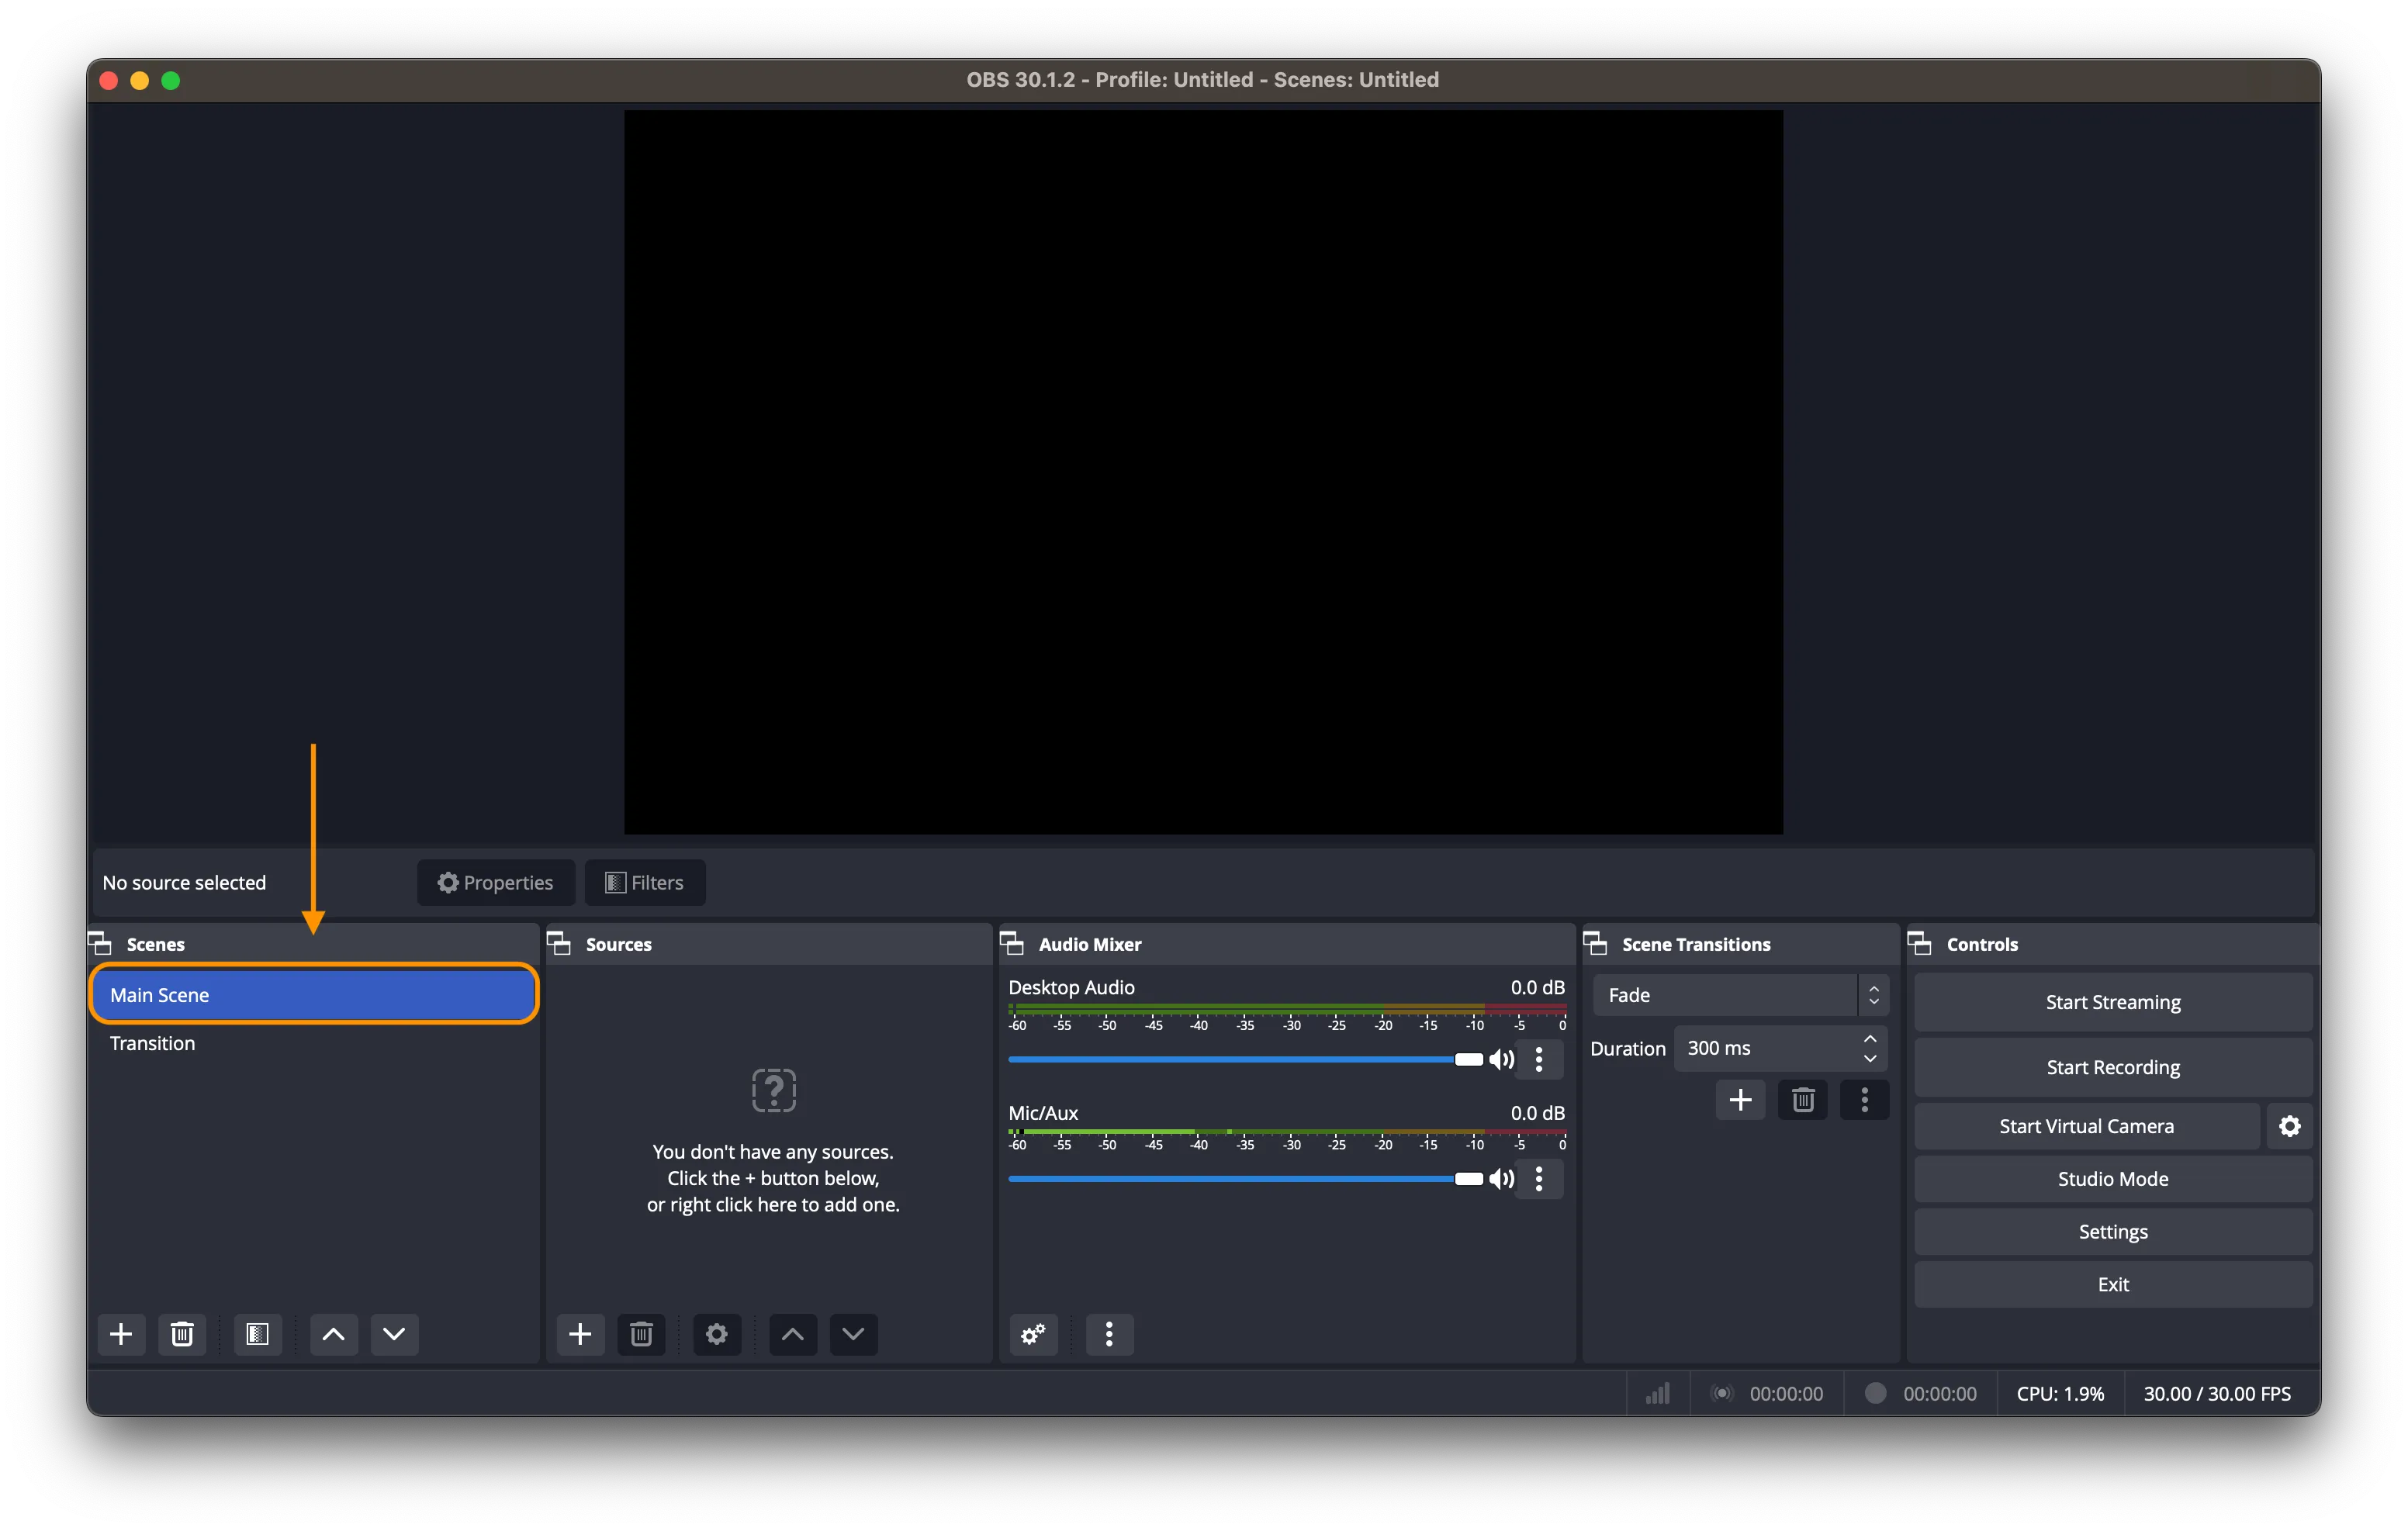
Right-click the “Scene”, select "Rename," and enter "Main Scene" or another name of your choice.
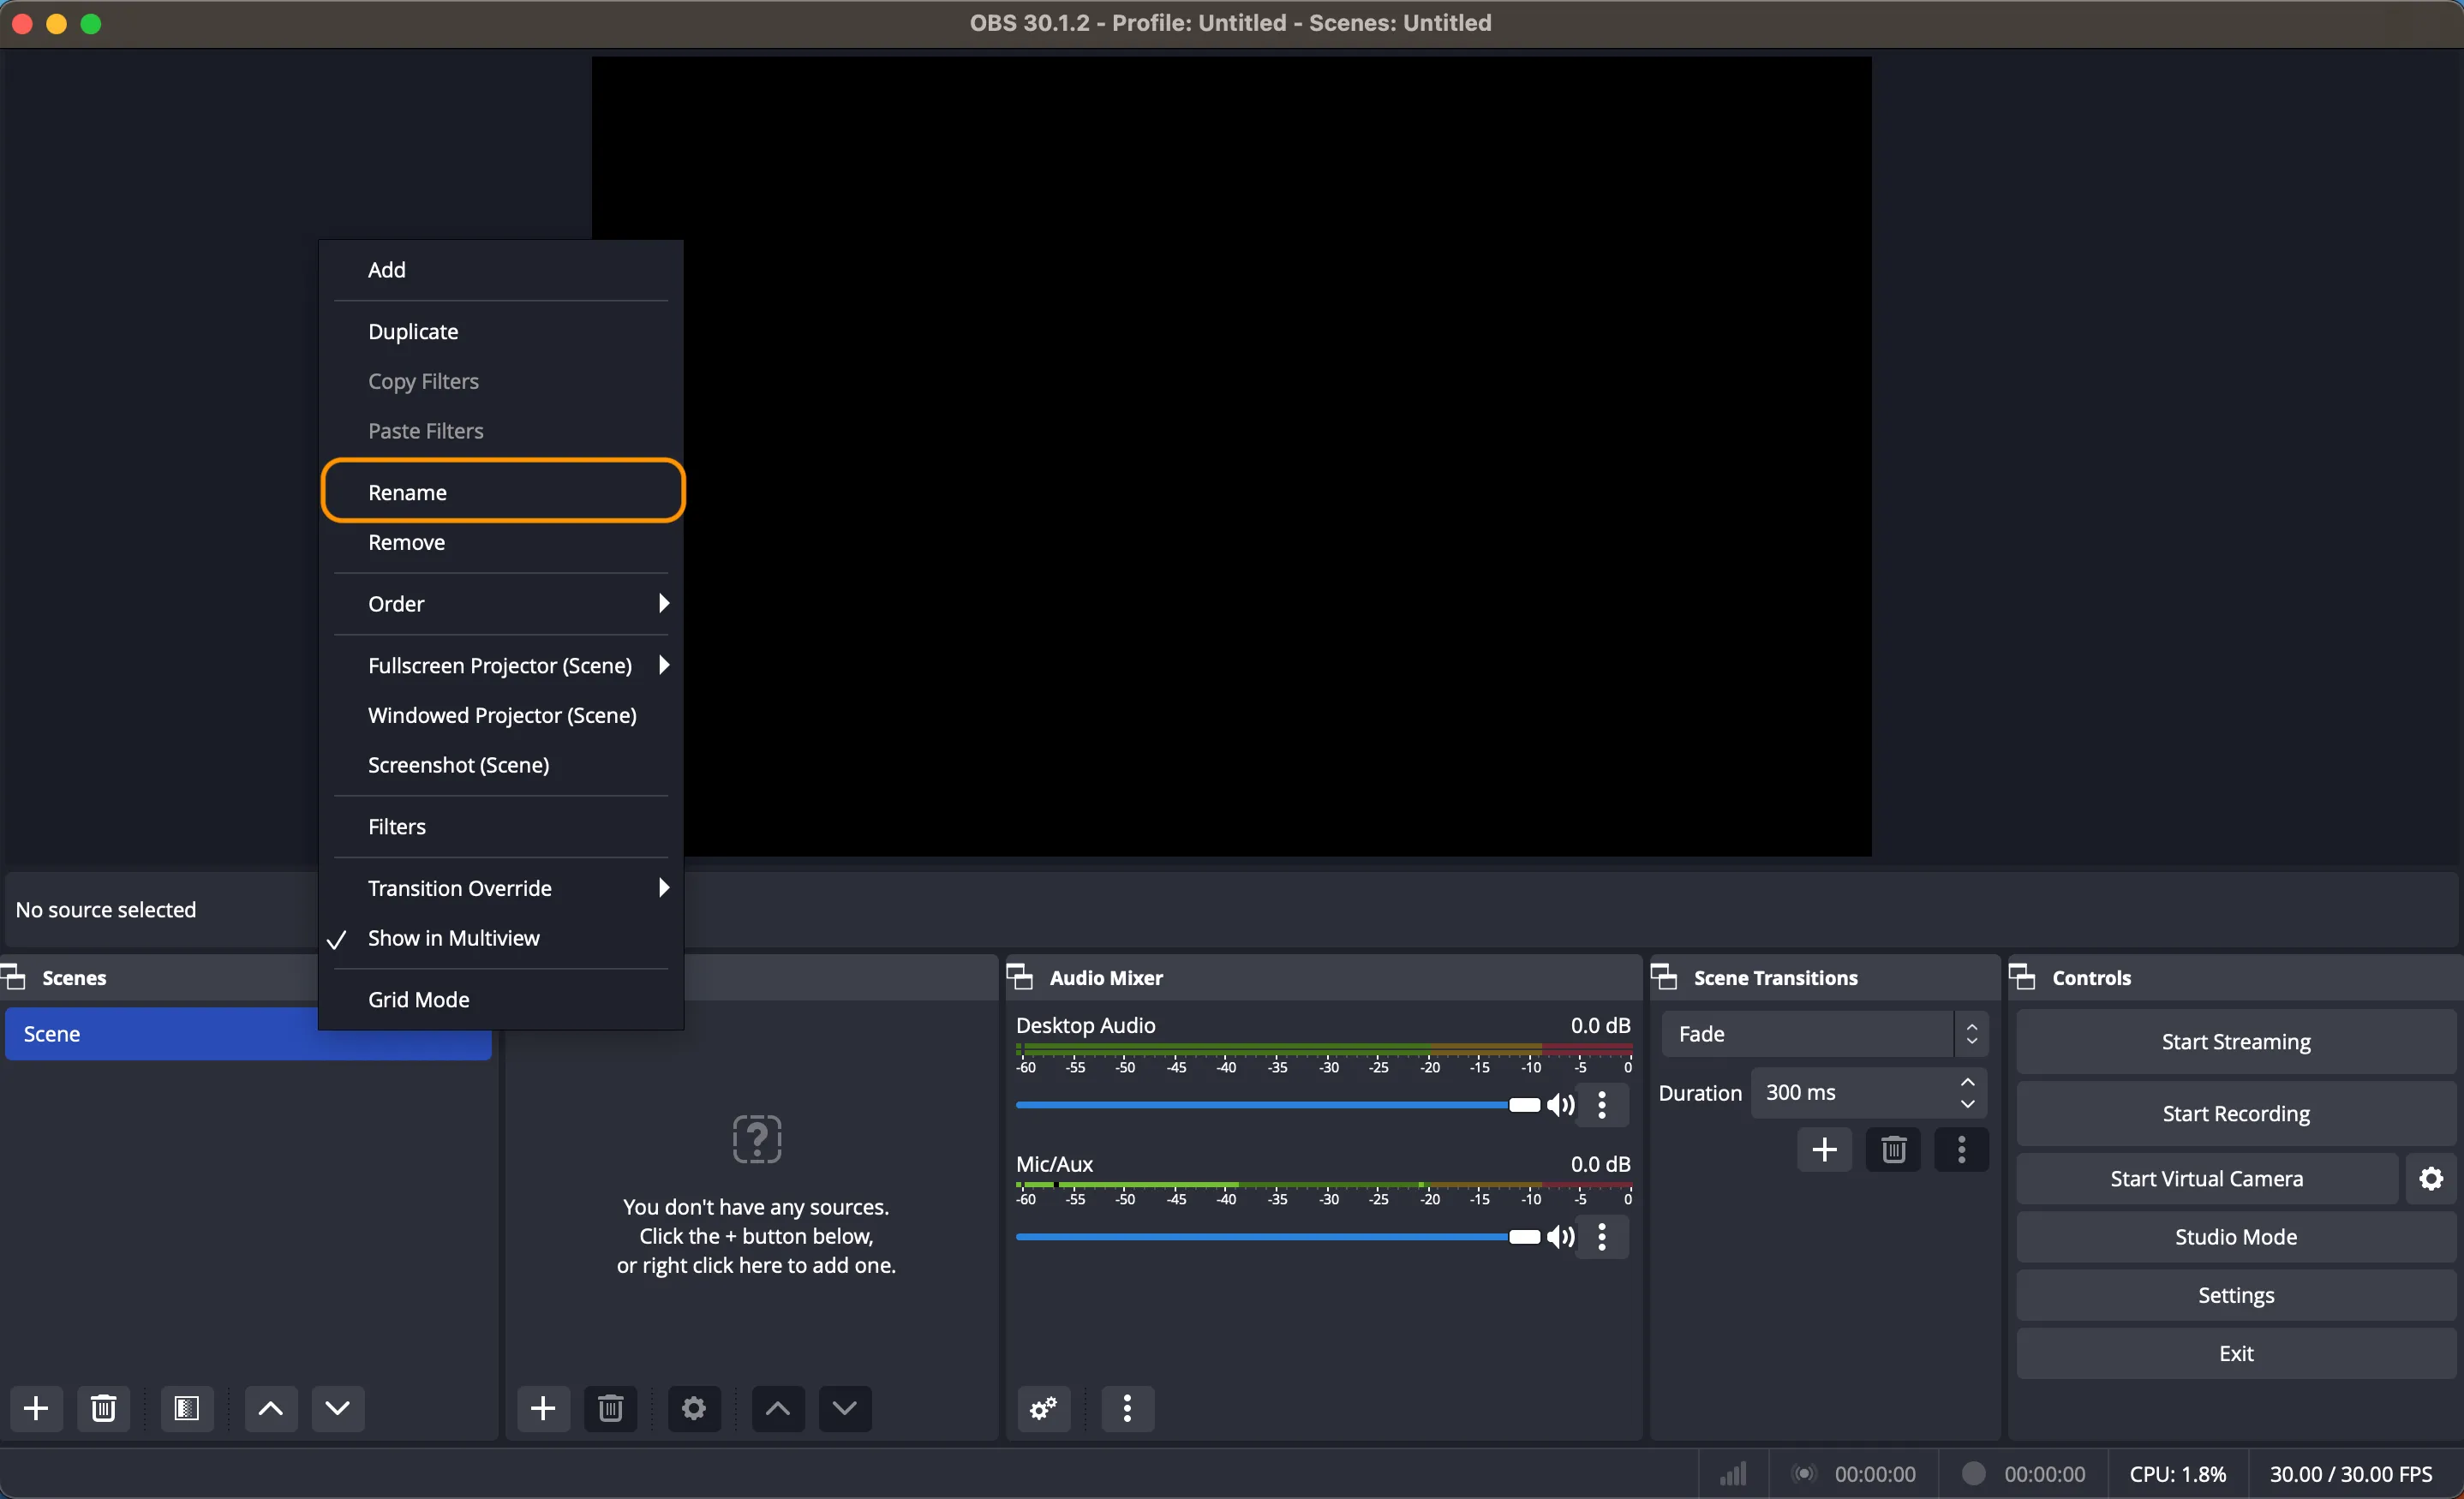
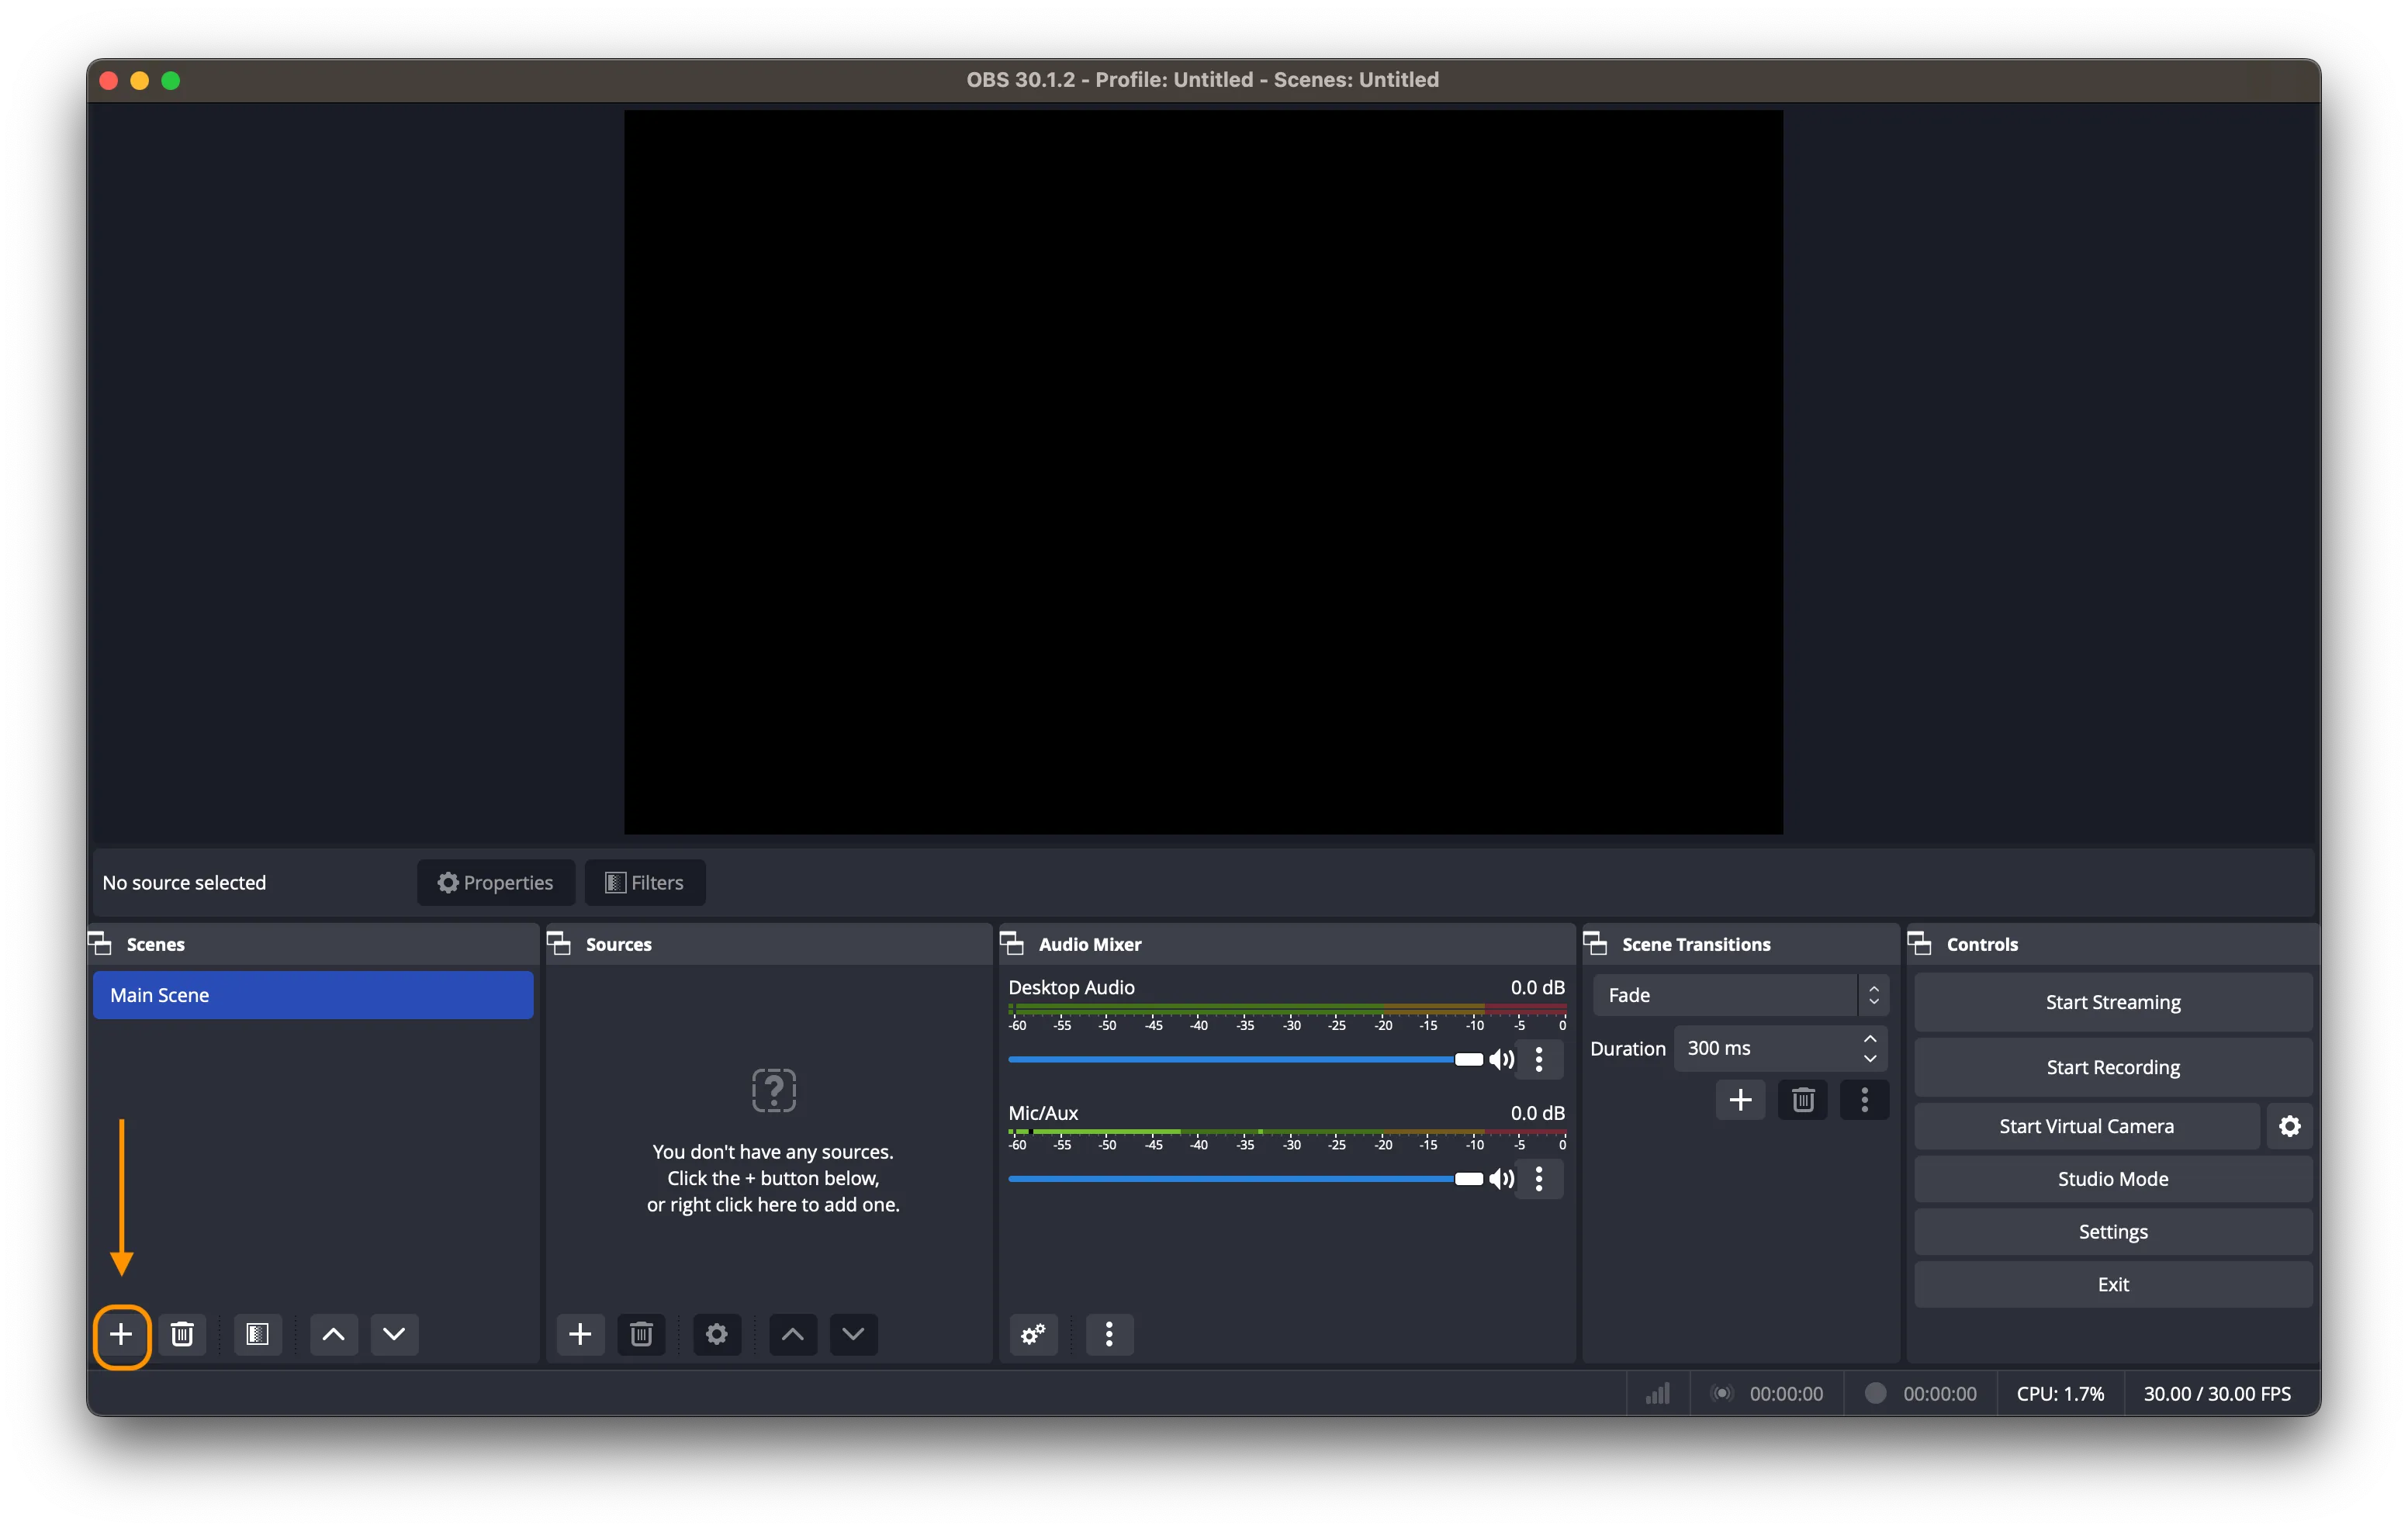
Click the "+" button in the scene window, and enter "Transition" or another name of your choice in the pop-up input box.
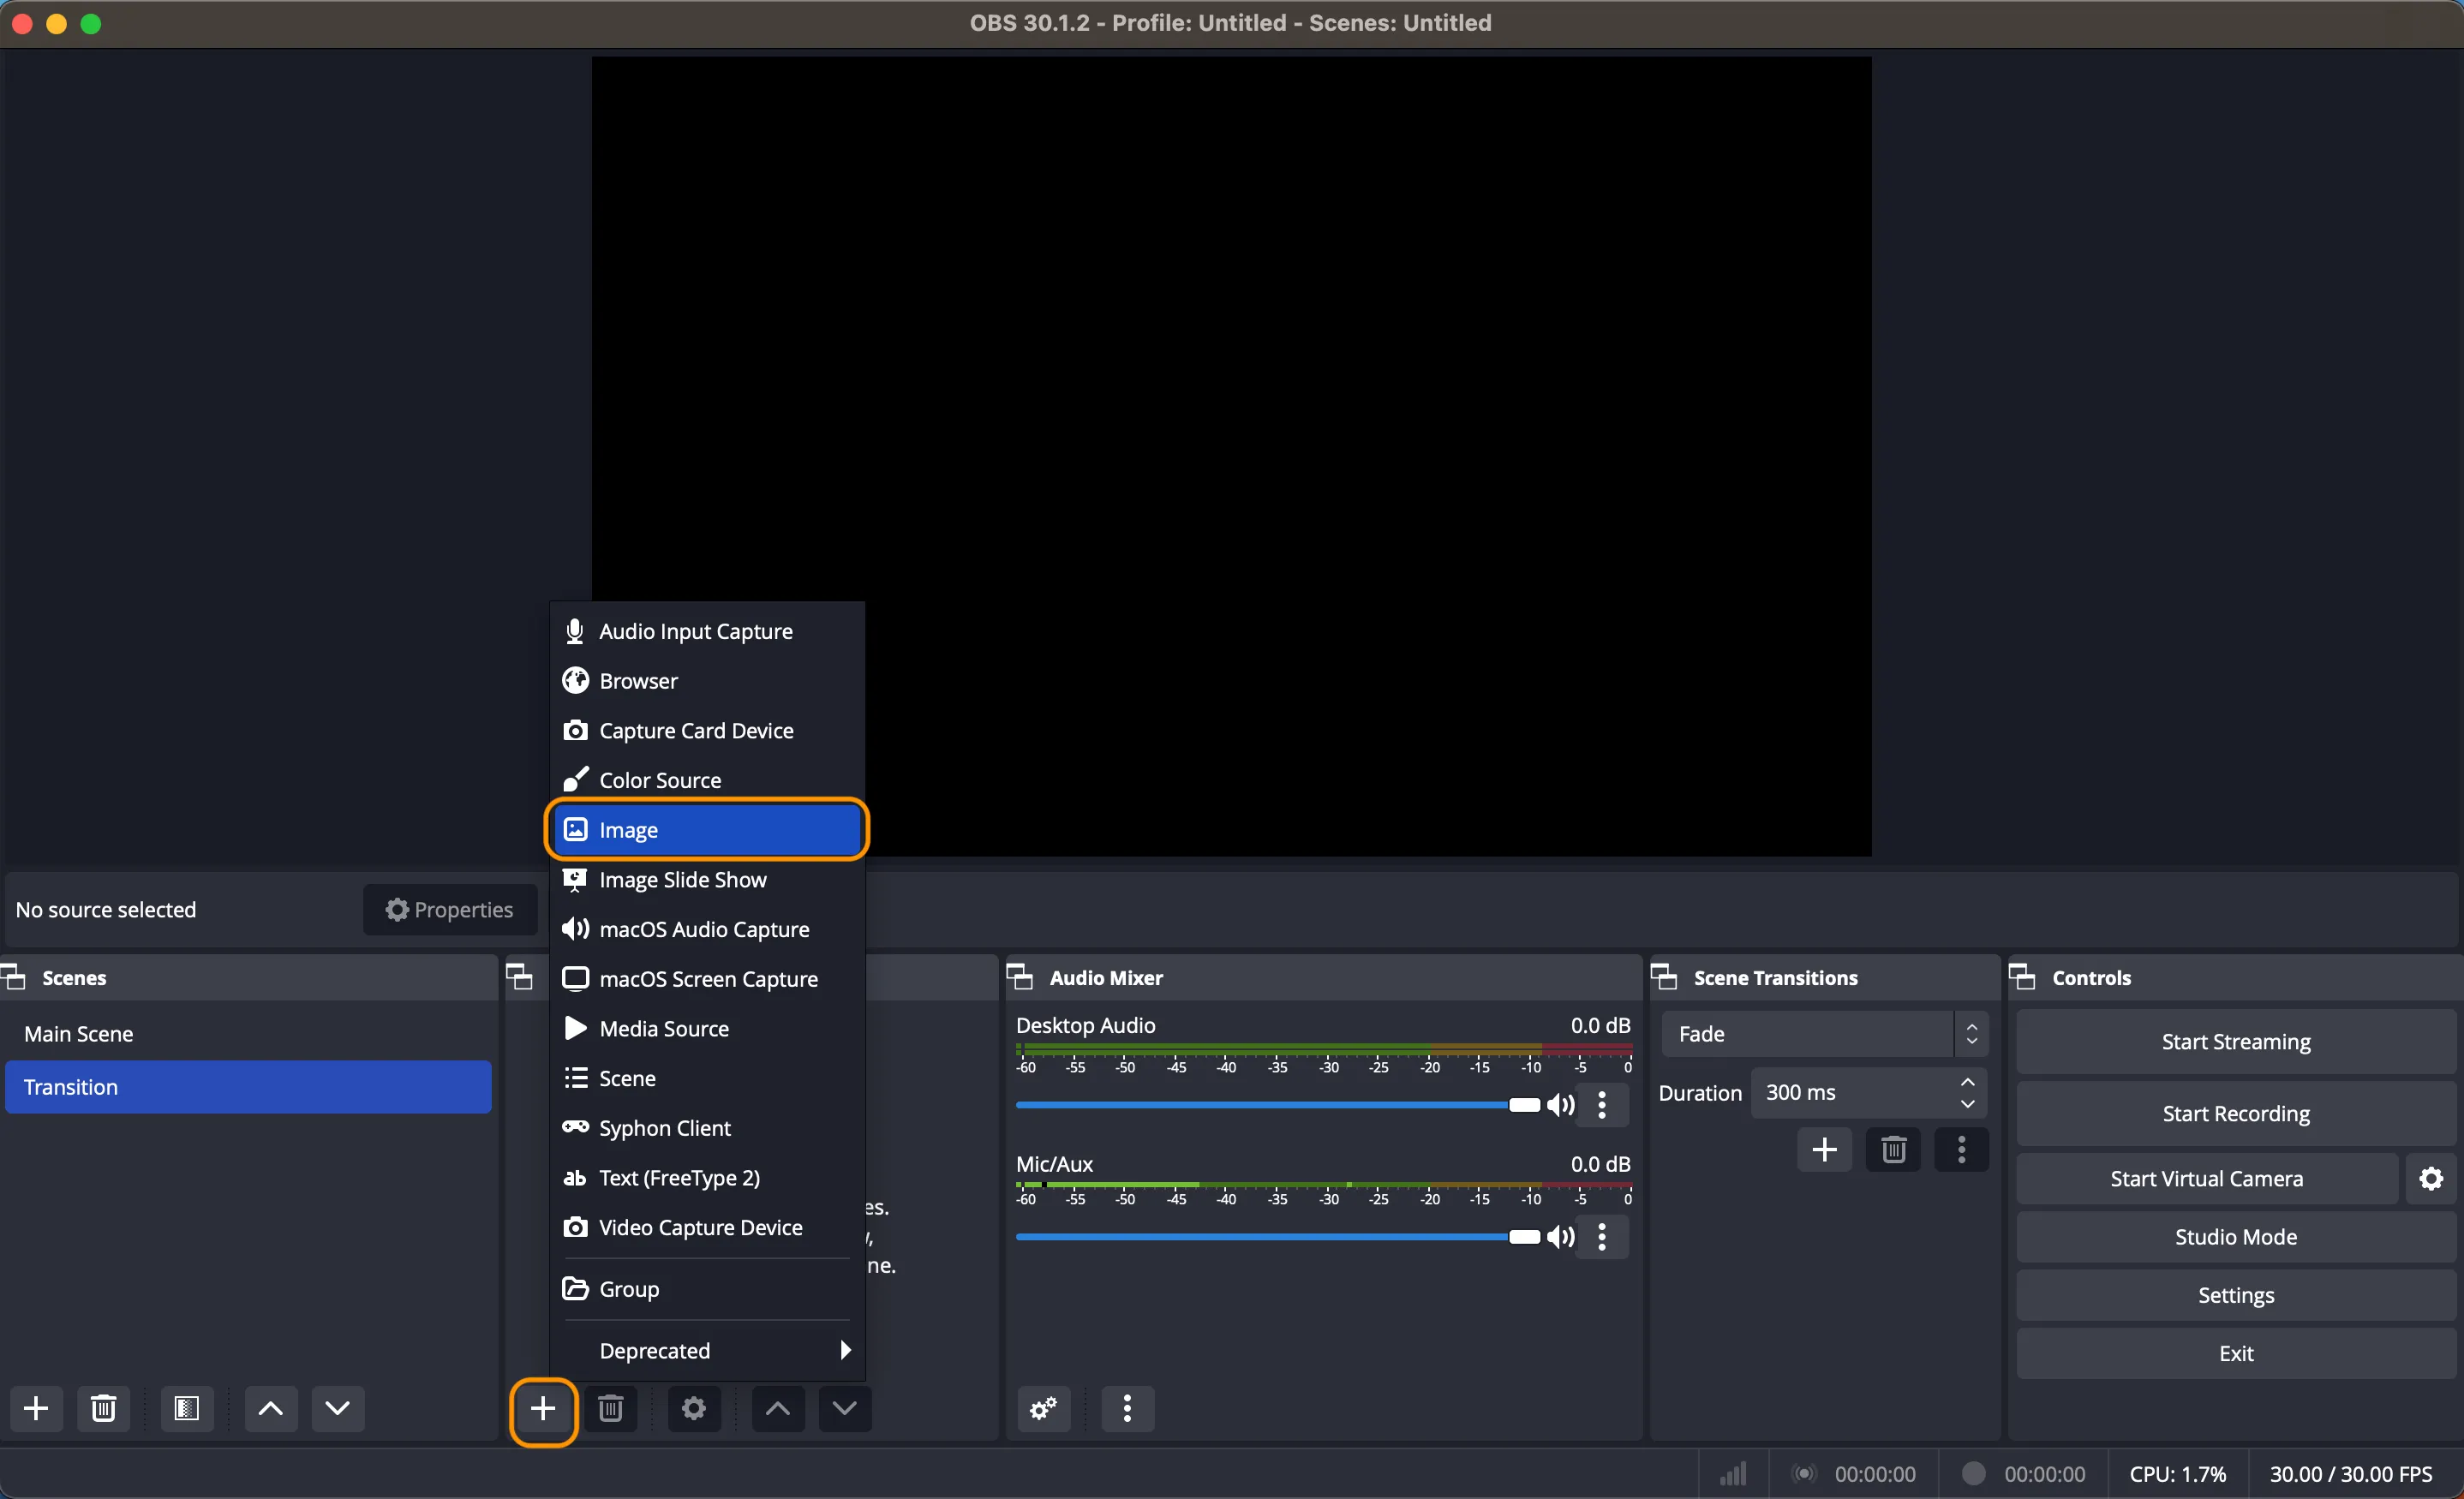
Step 2: Set up the Transition Image
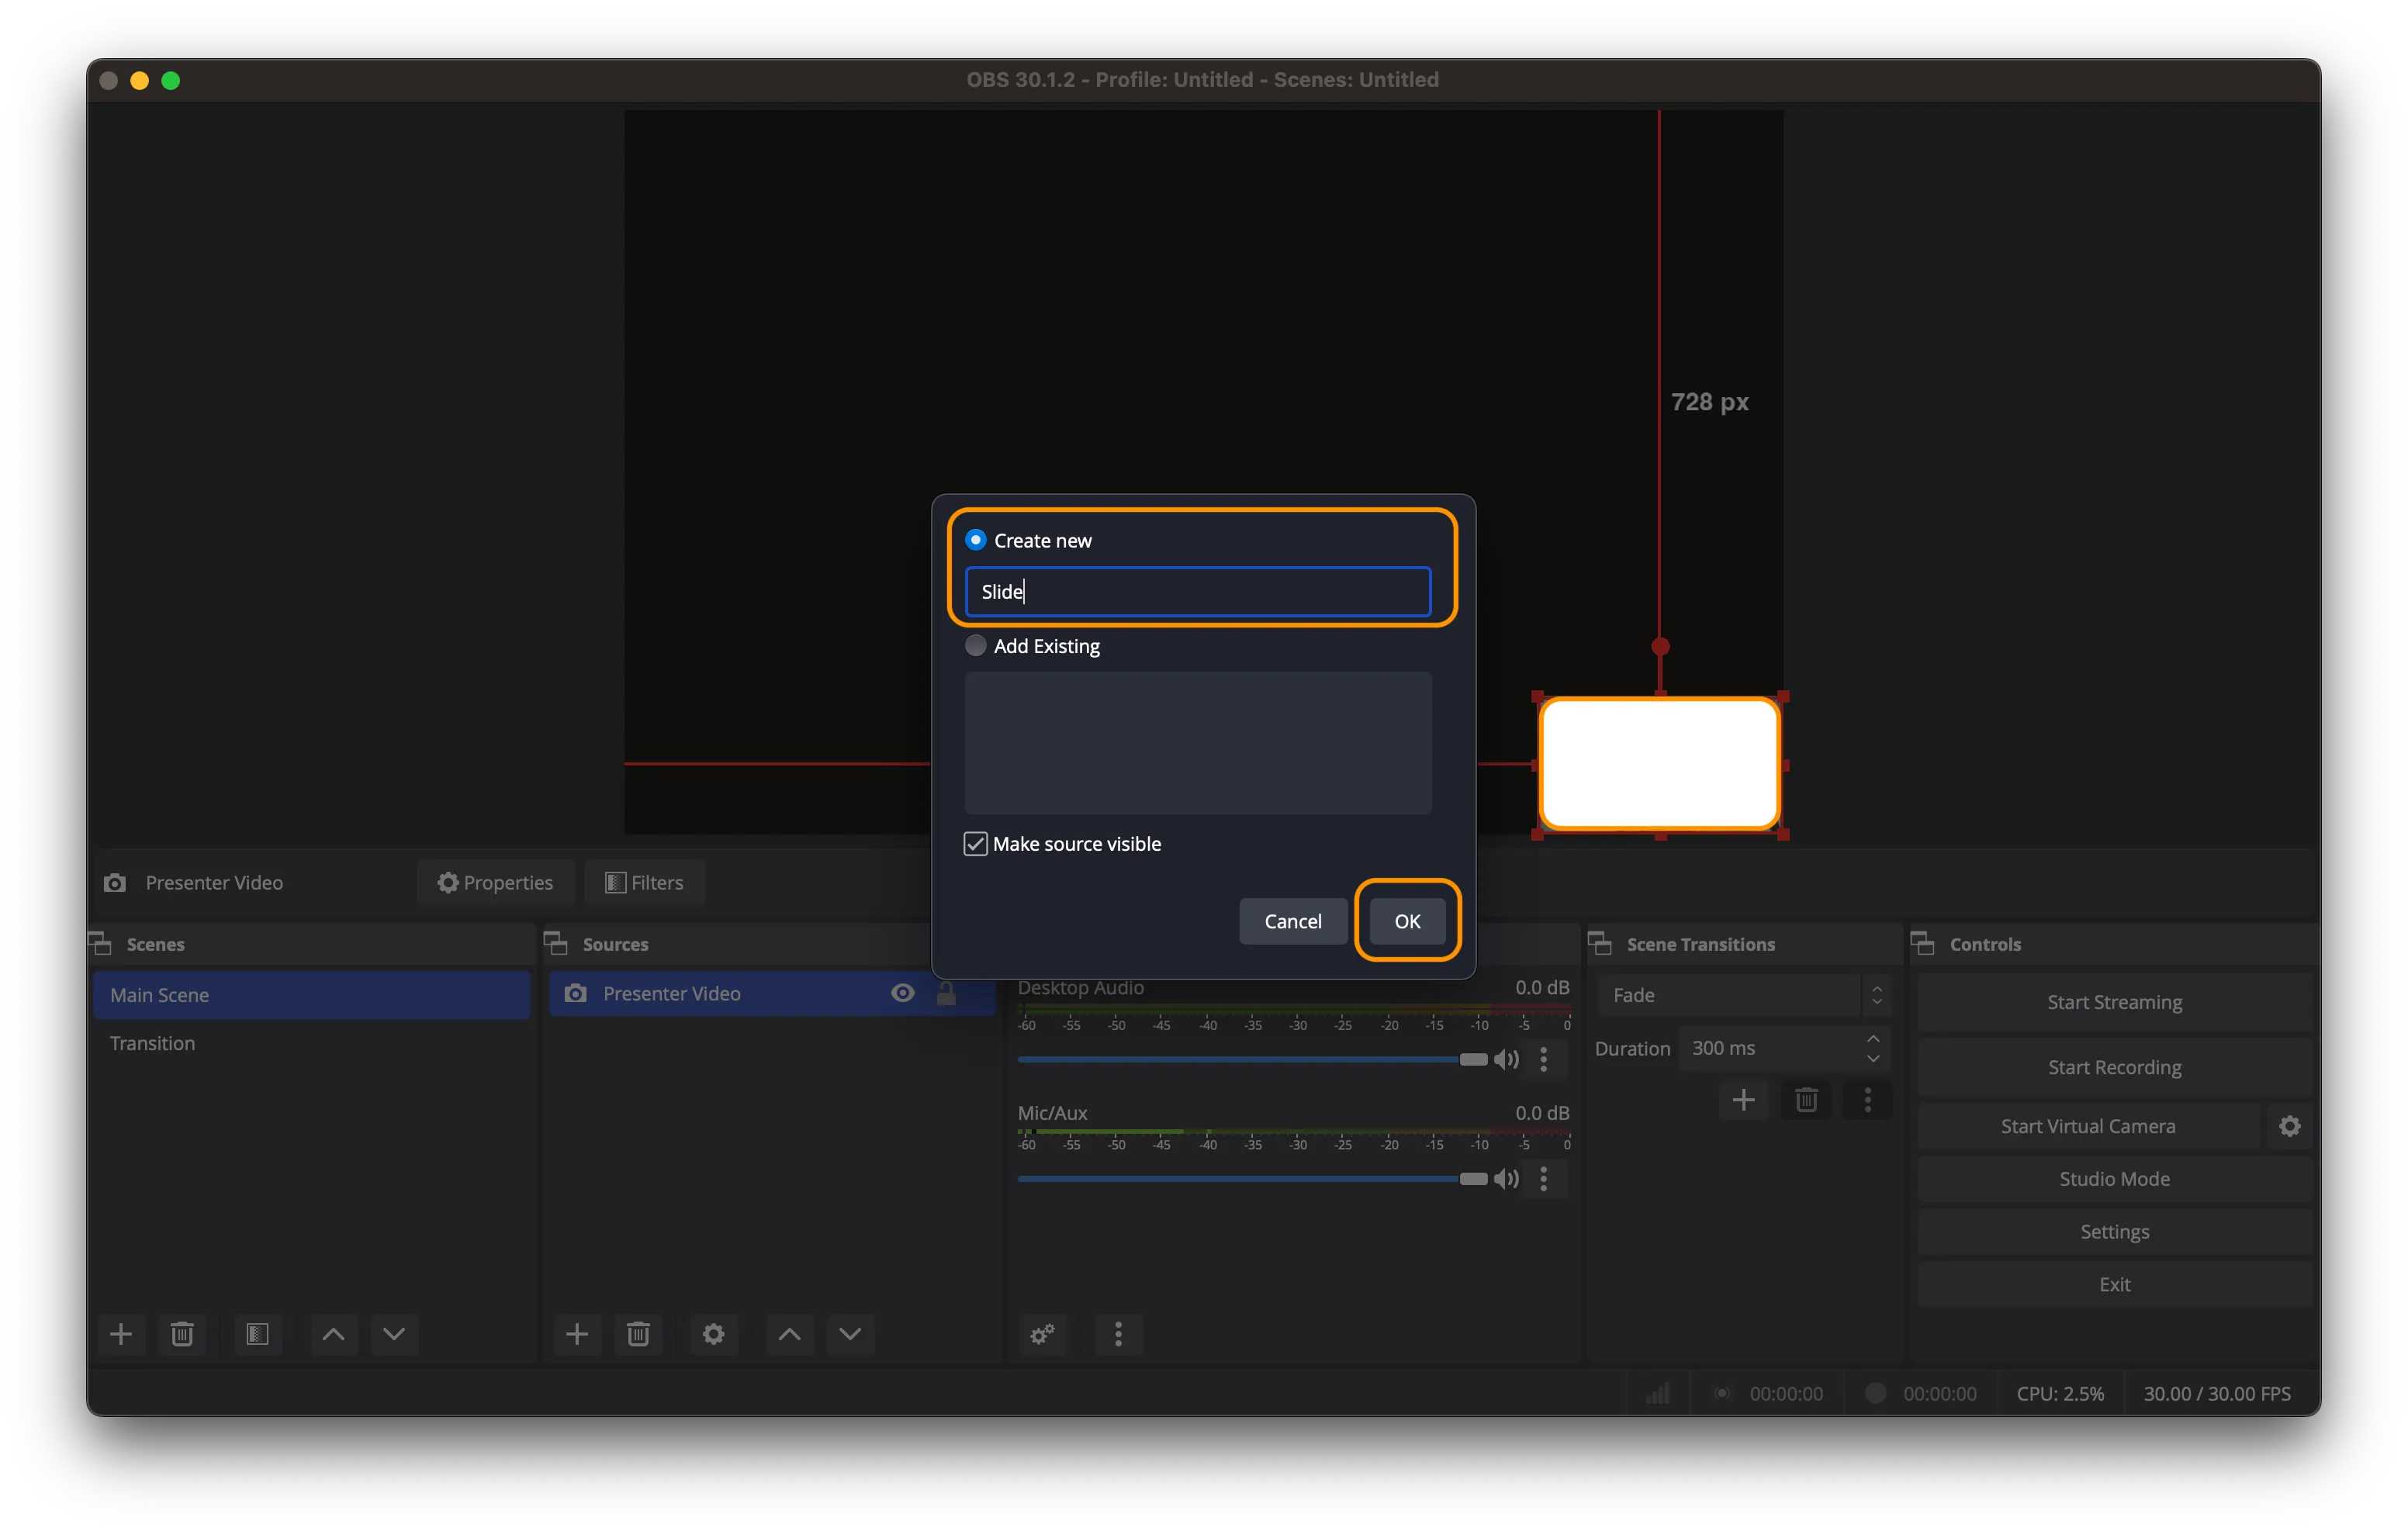
Click the newly created "Transition" scene, and in the "Sources" panel, click "+," select "Image," choose "Create New Source," and name it "Transition Image" or another name of your choice.
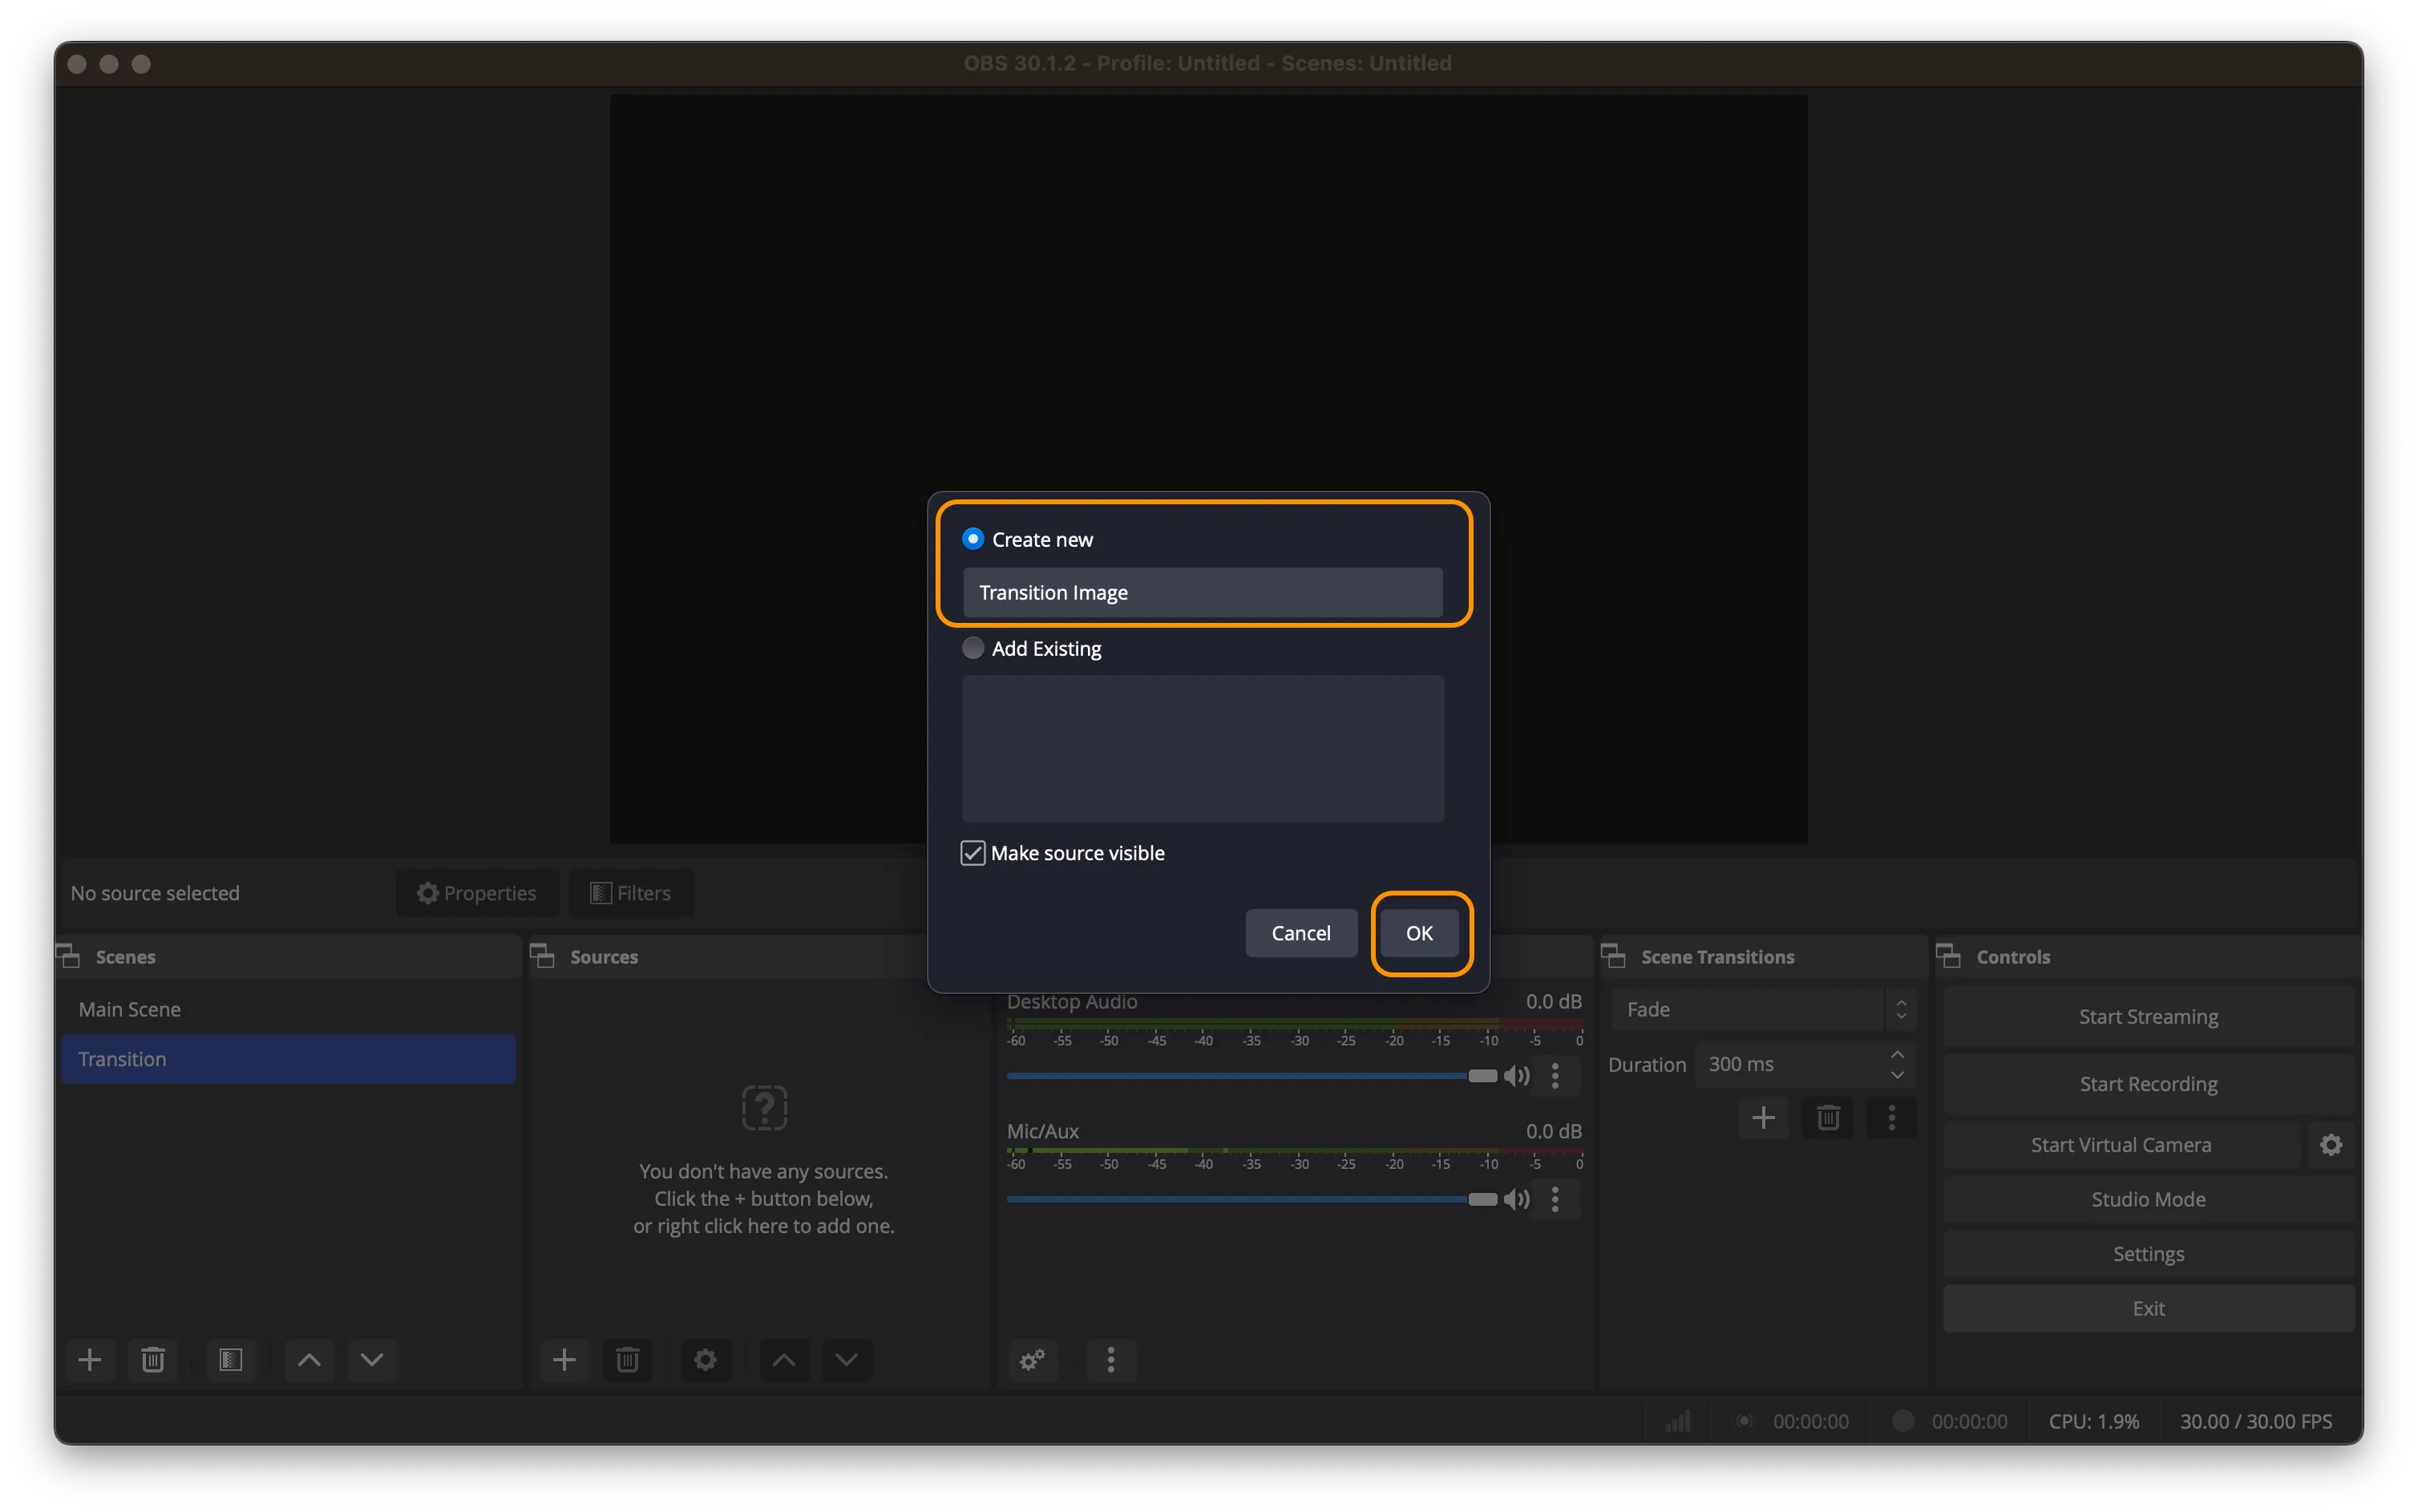
- Select your transition image, then click "OK."
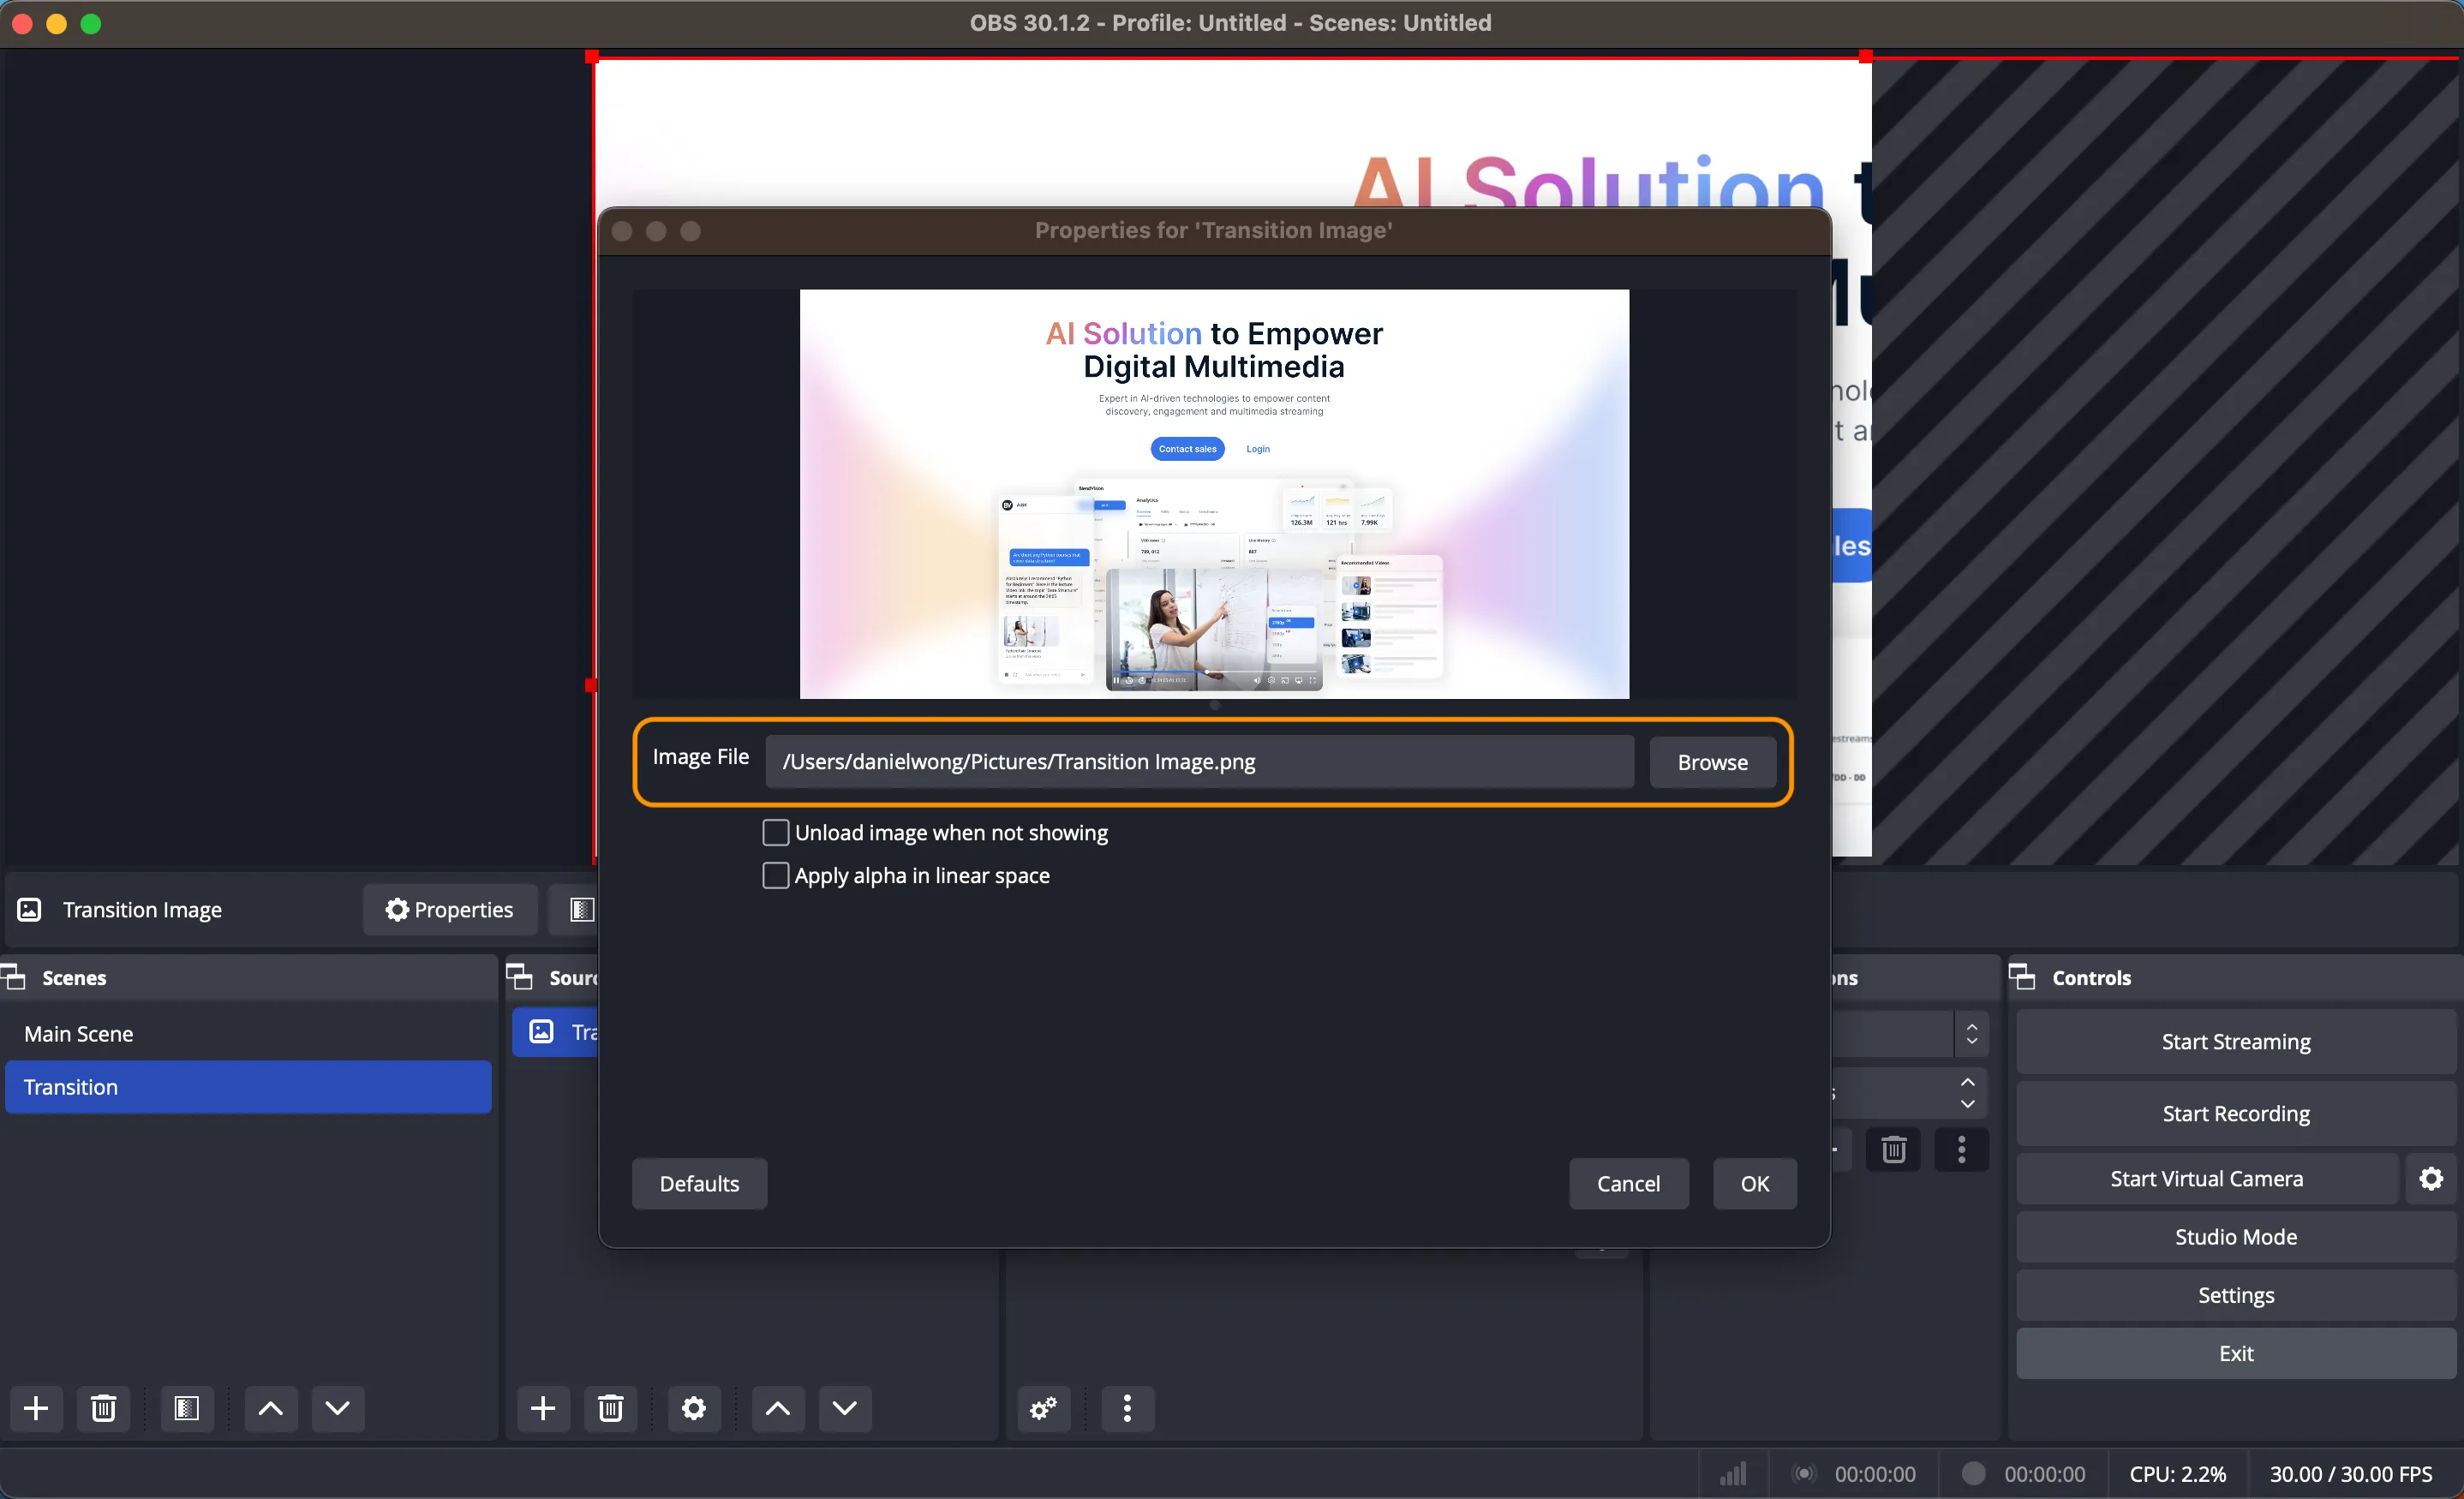
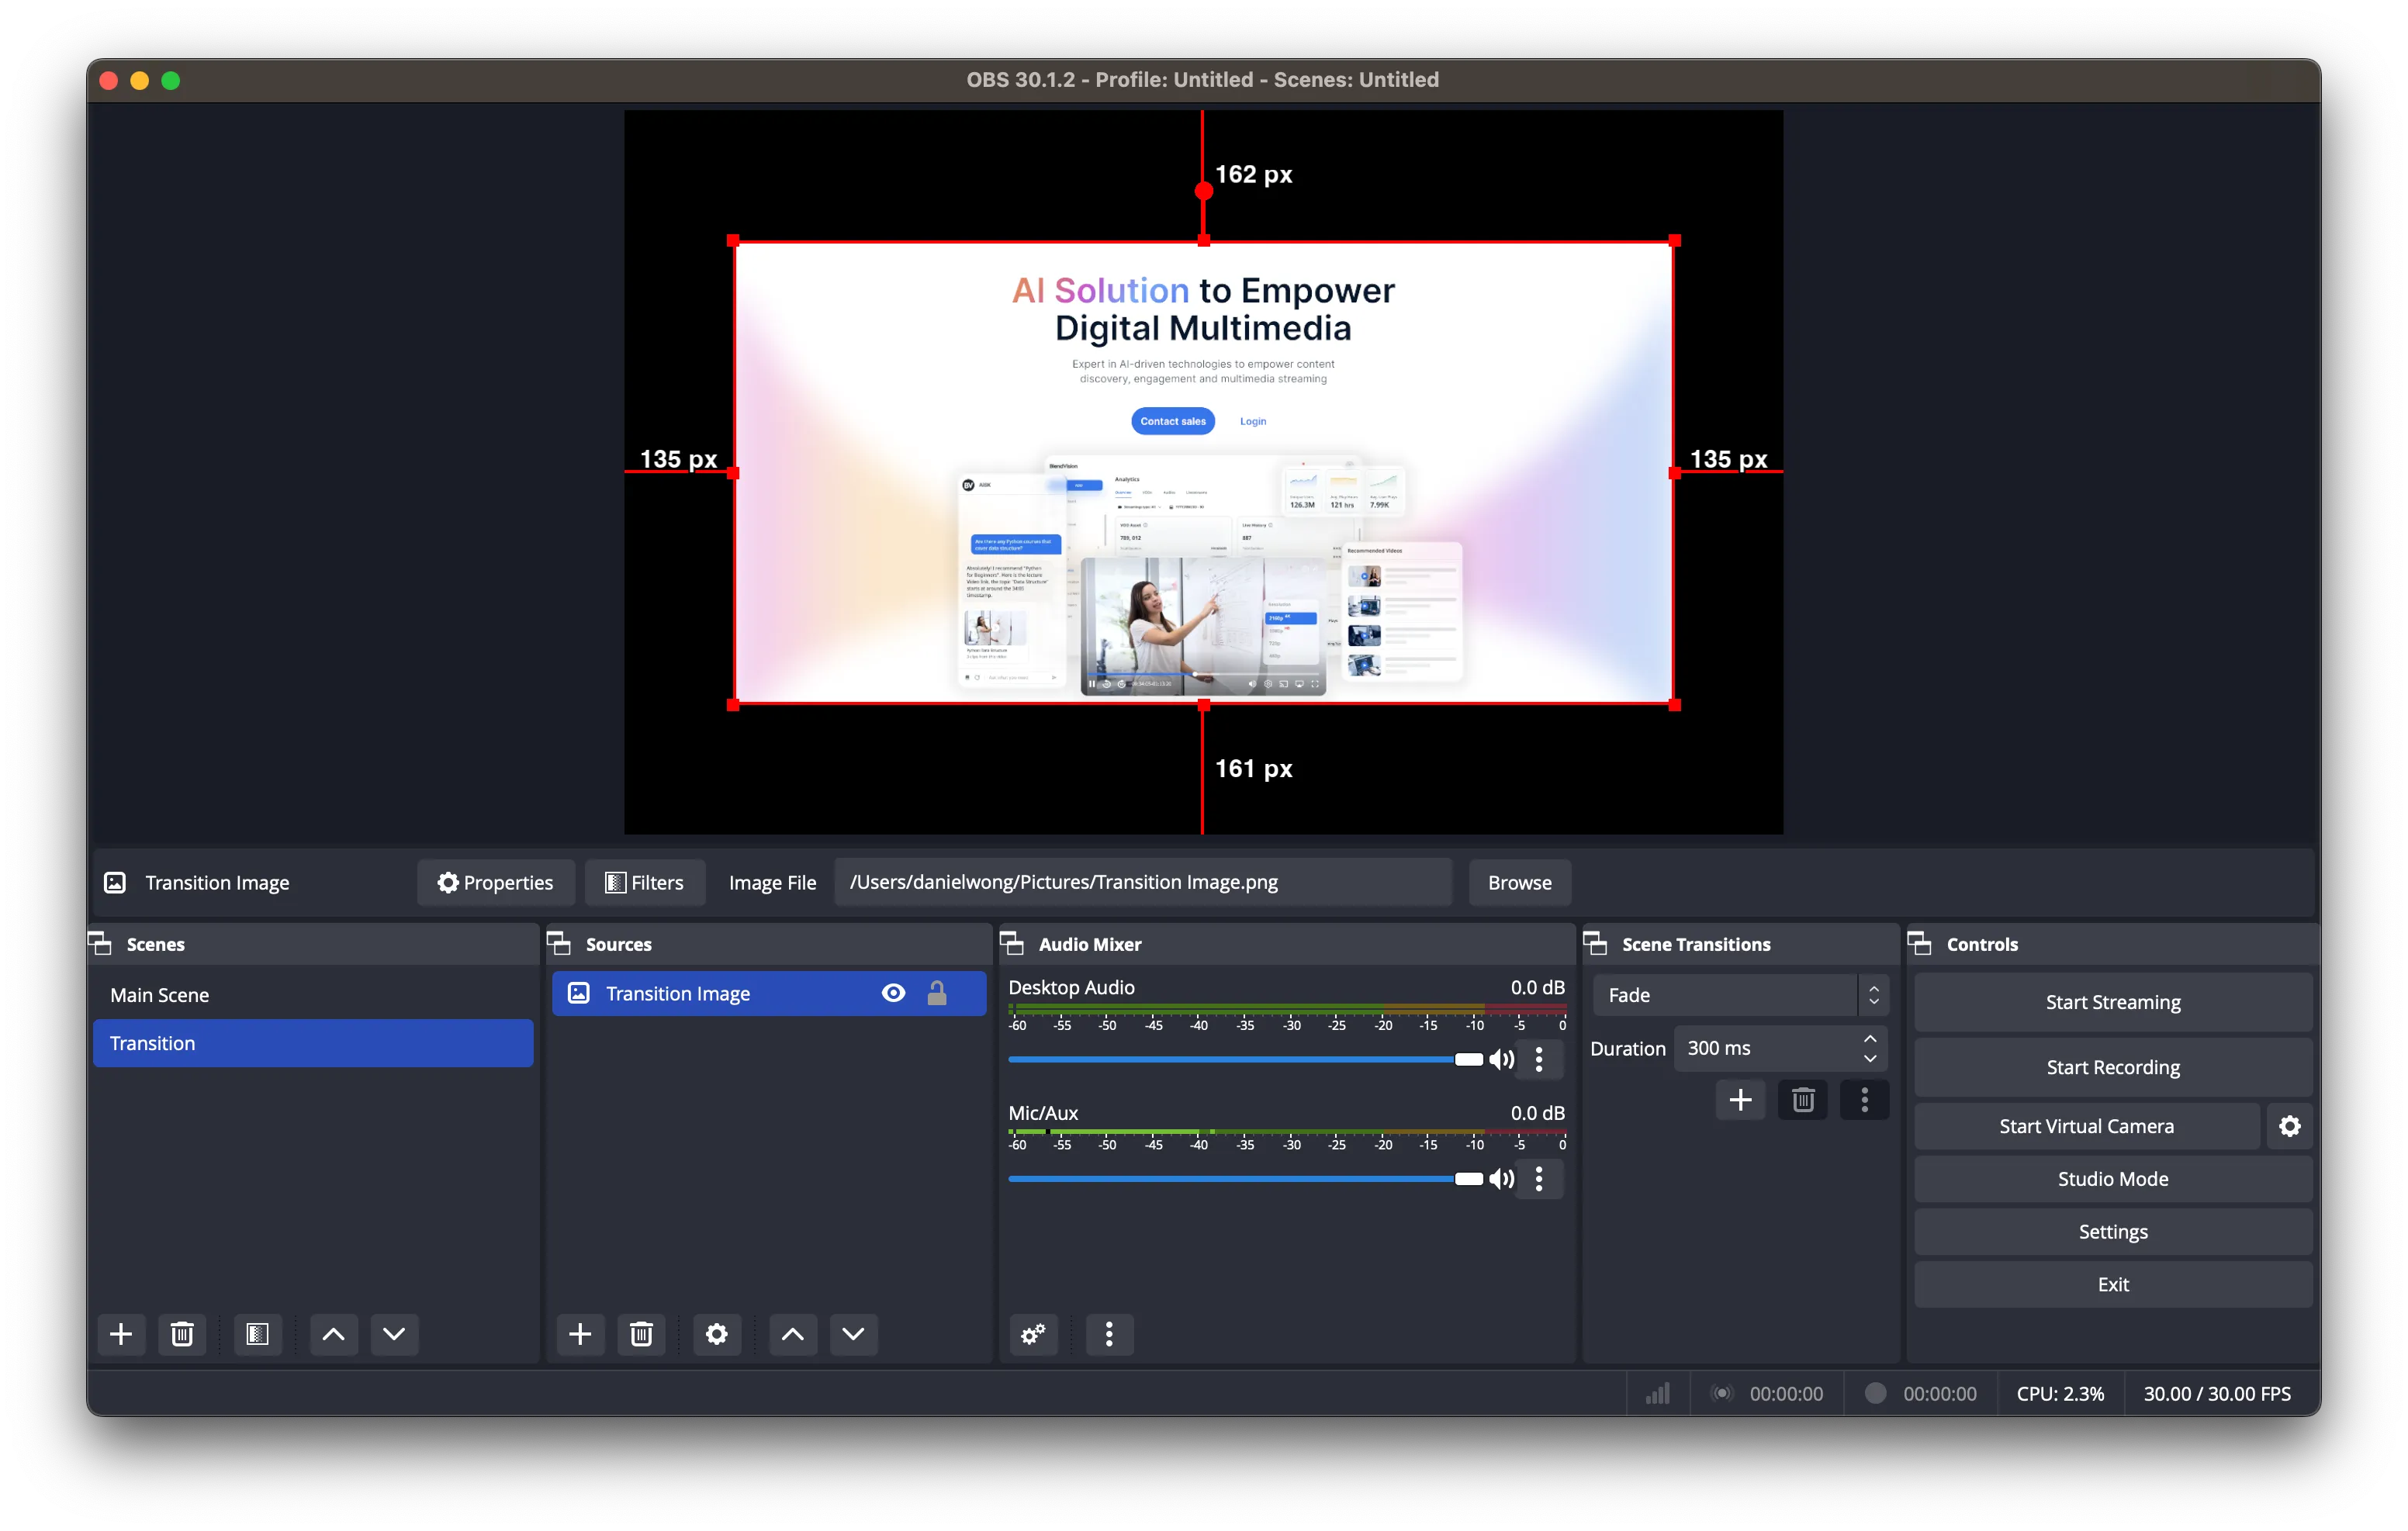
- Adjust the size and display position using the red box to ensure the image is fully displayed in the live preview window.
Step 3: Set up the Main Scene
- Click on the "Main Scene" created in Step 1.
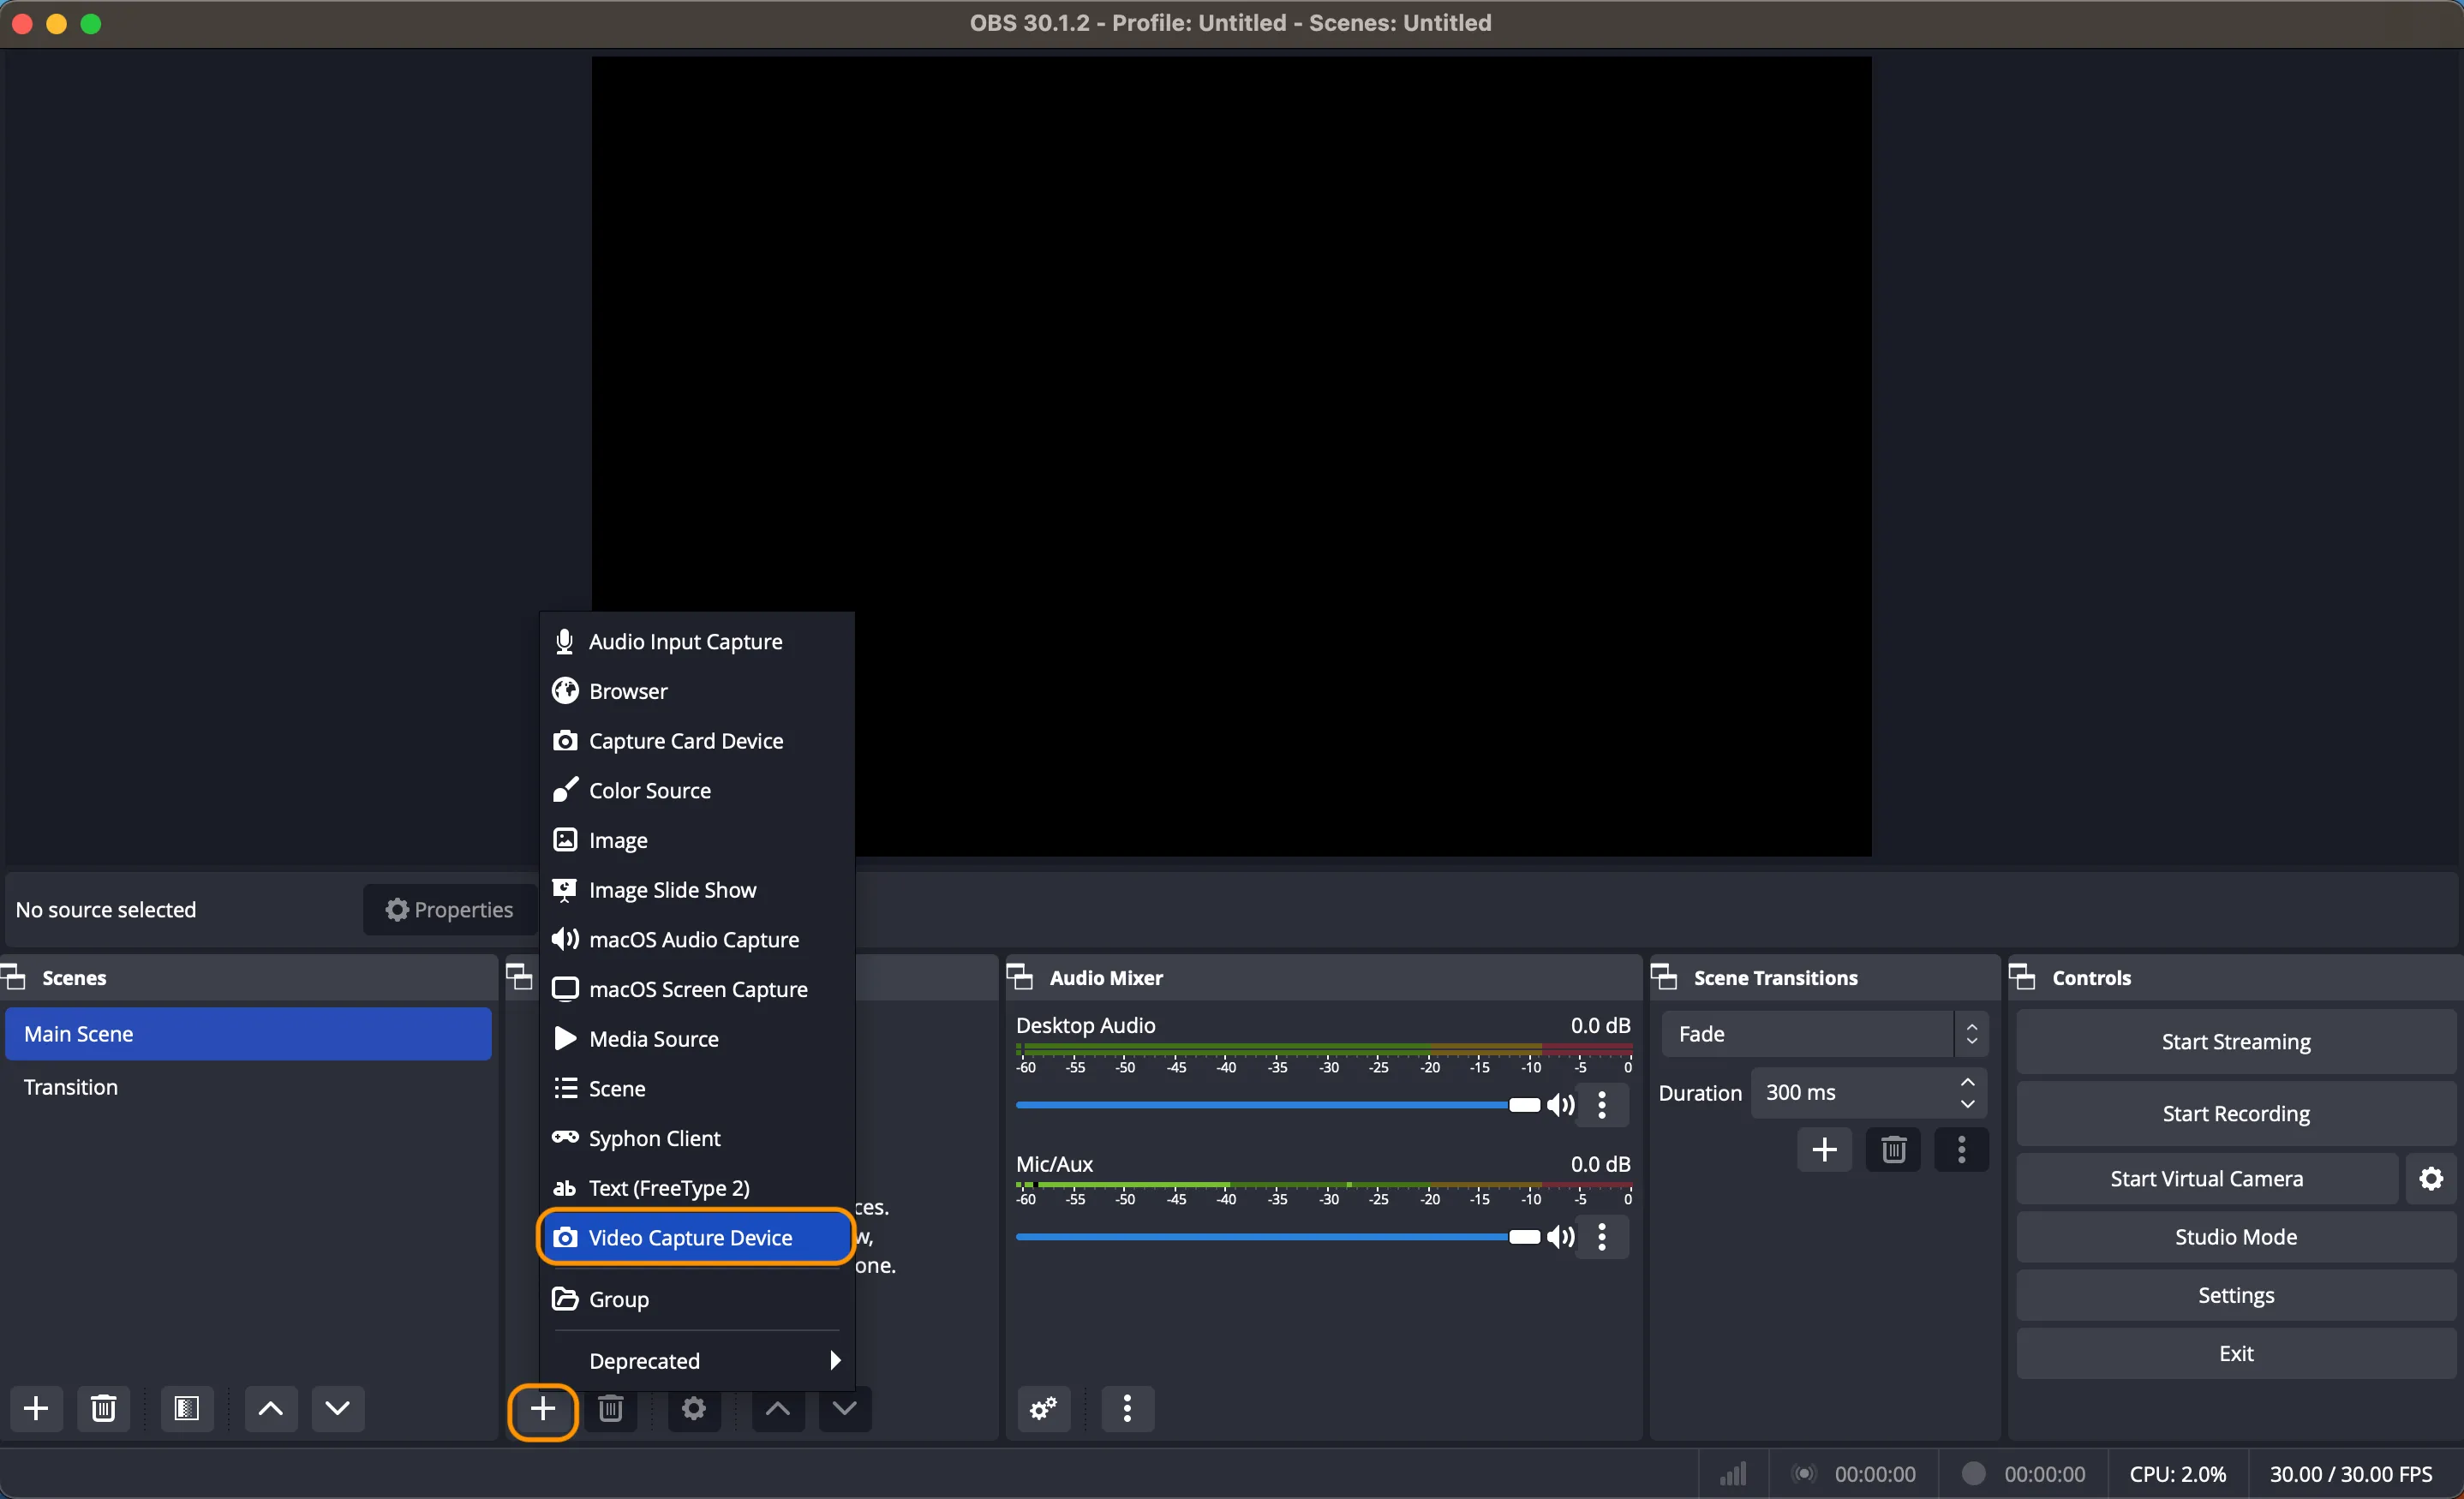
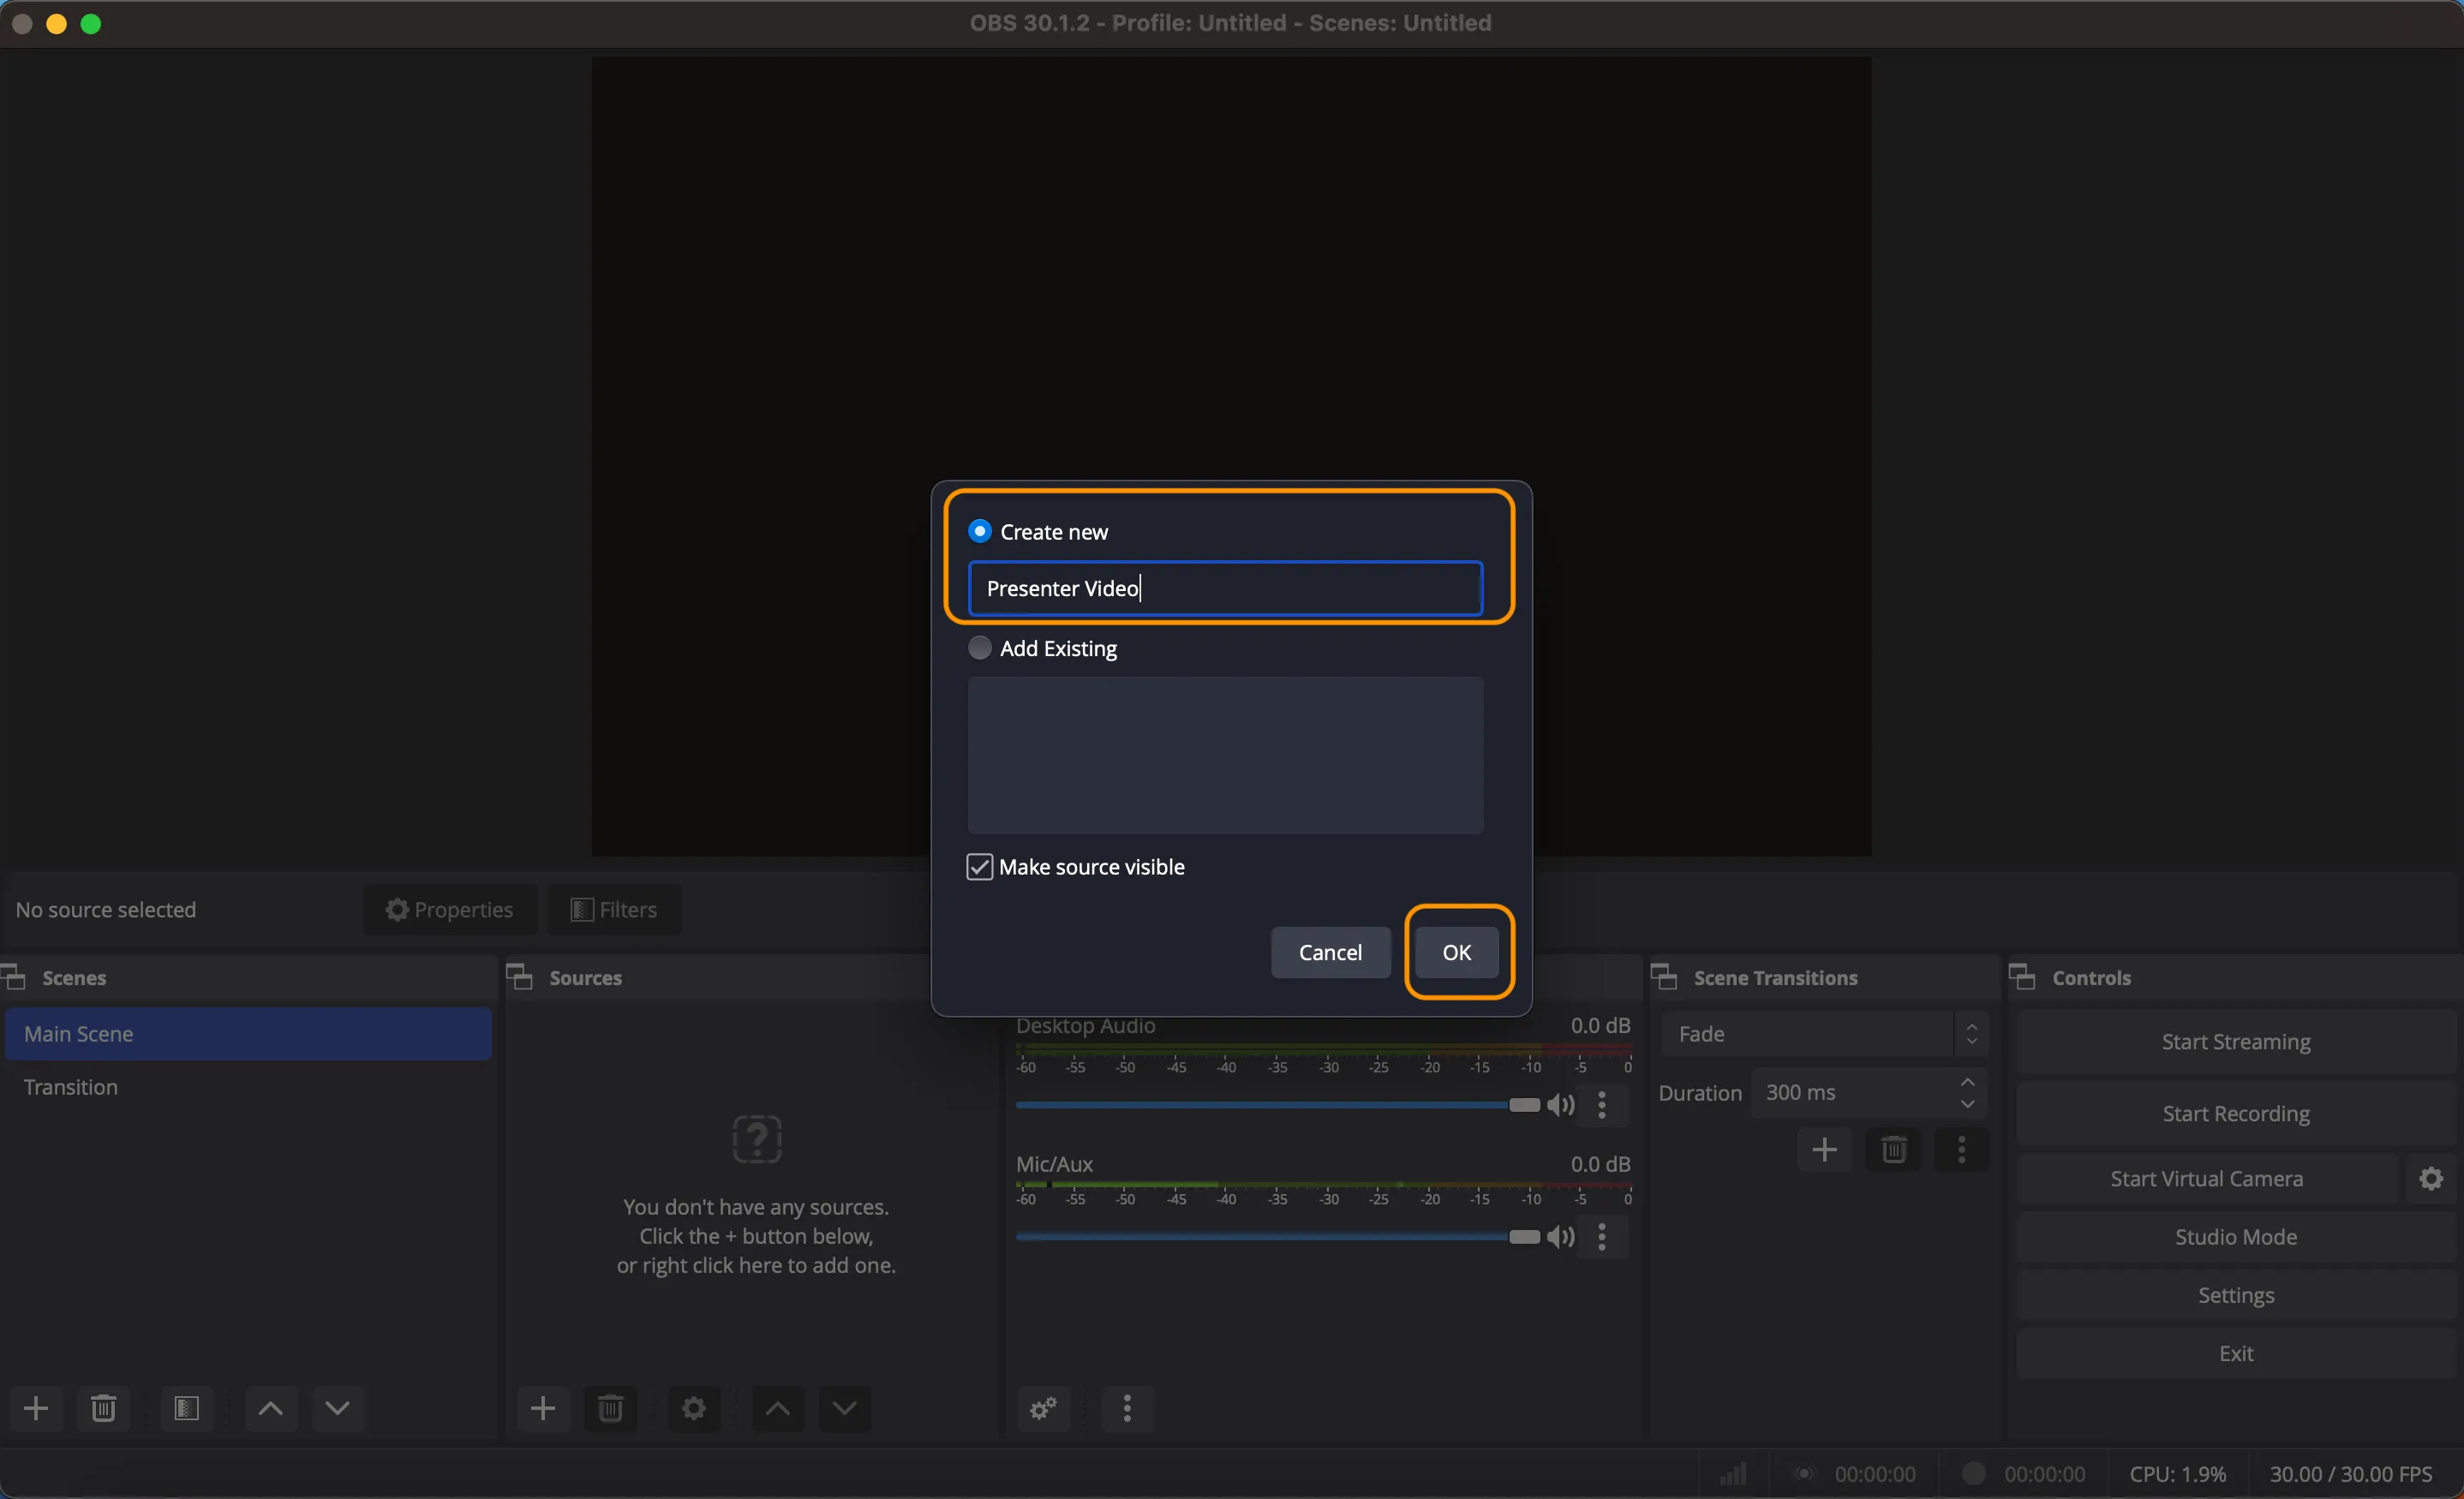
- Click "+" in the "Sources," select "Video Capture Device," choose "Create New Source," and name it "Presenter Video" or another name of your choice.
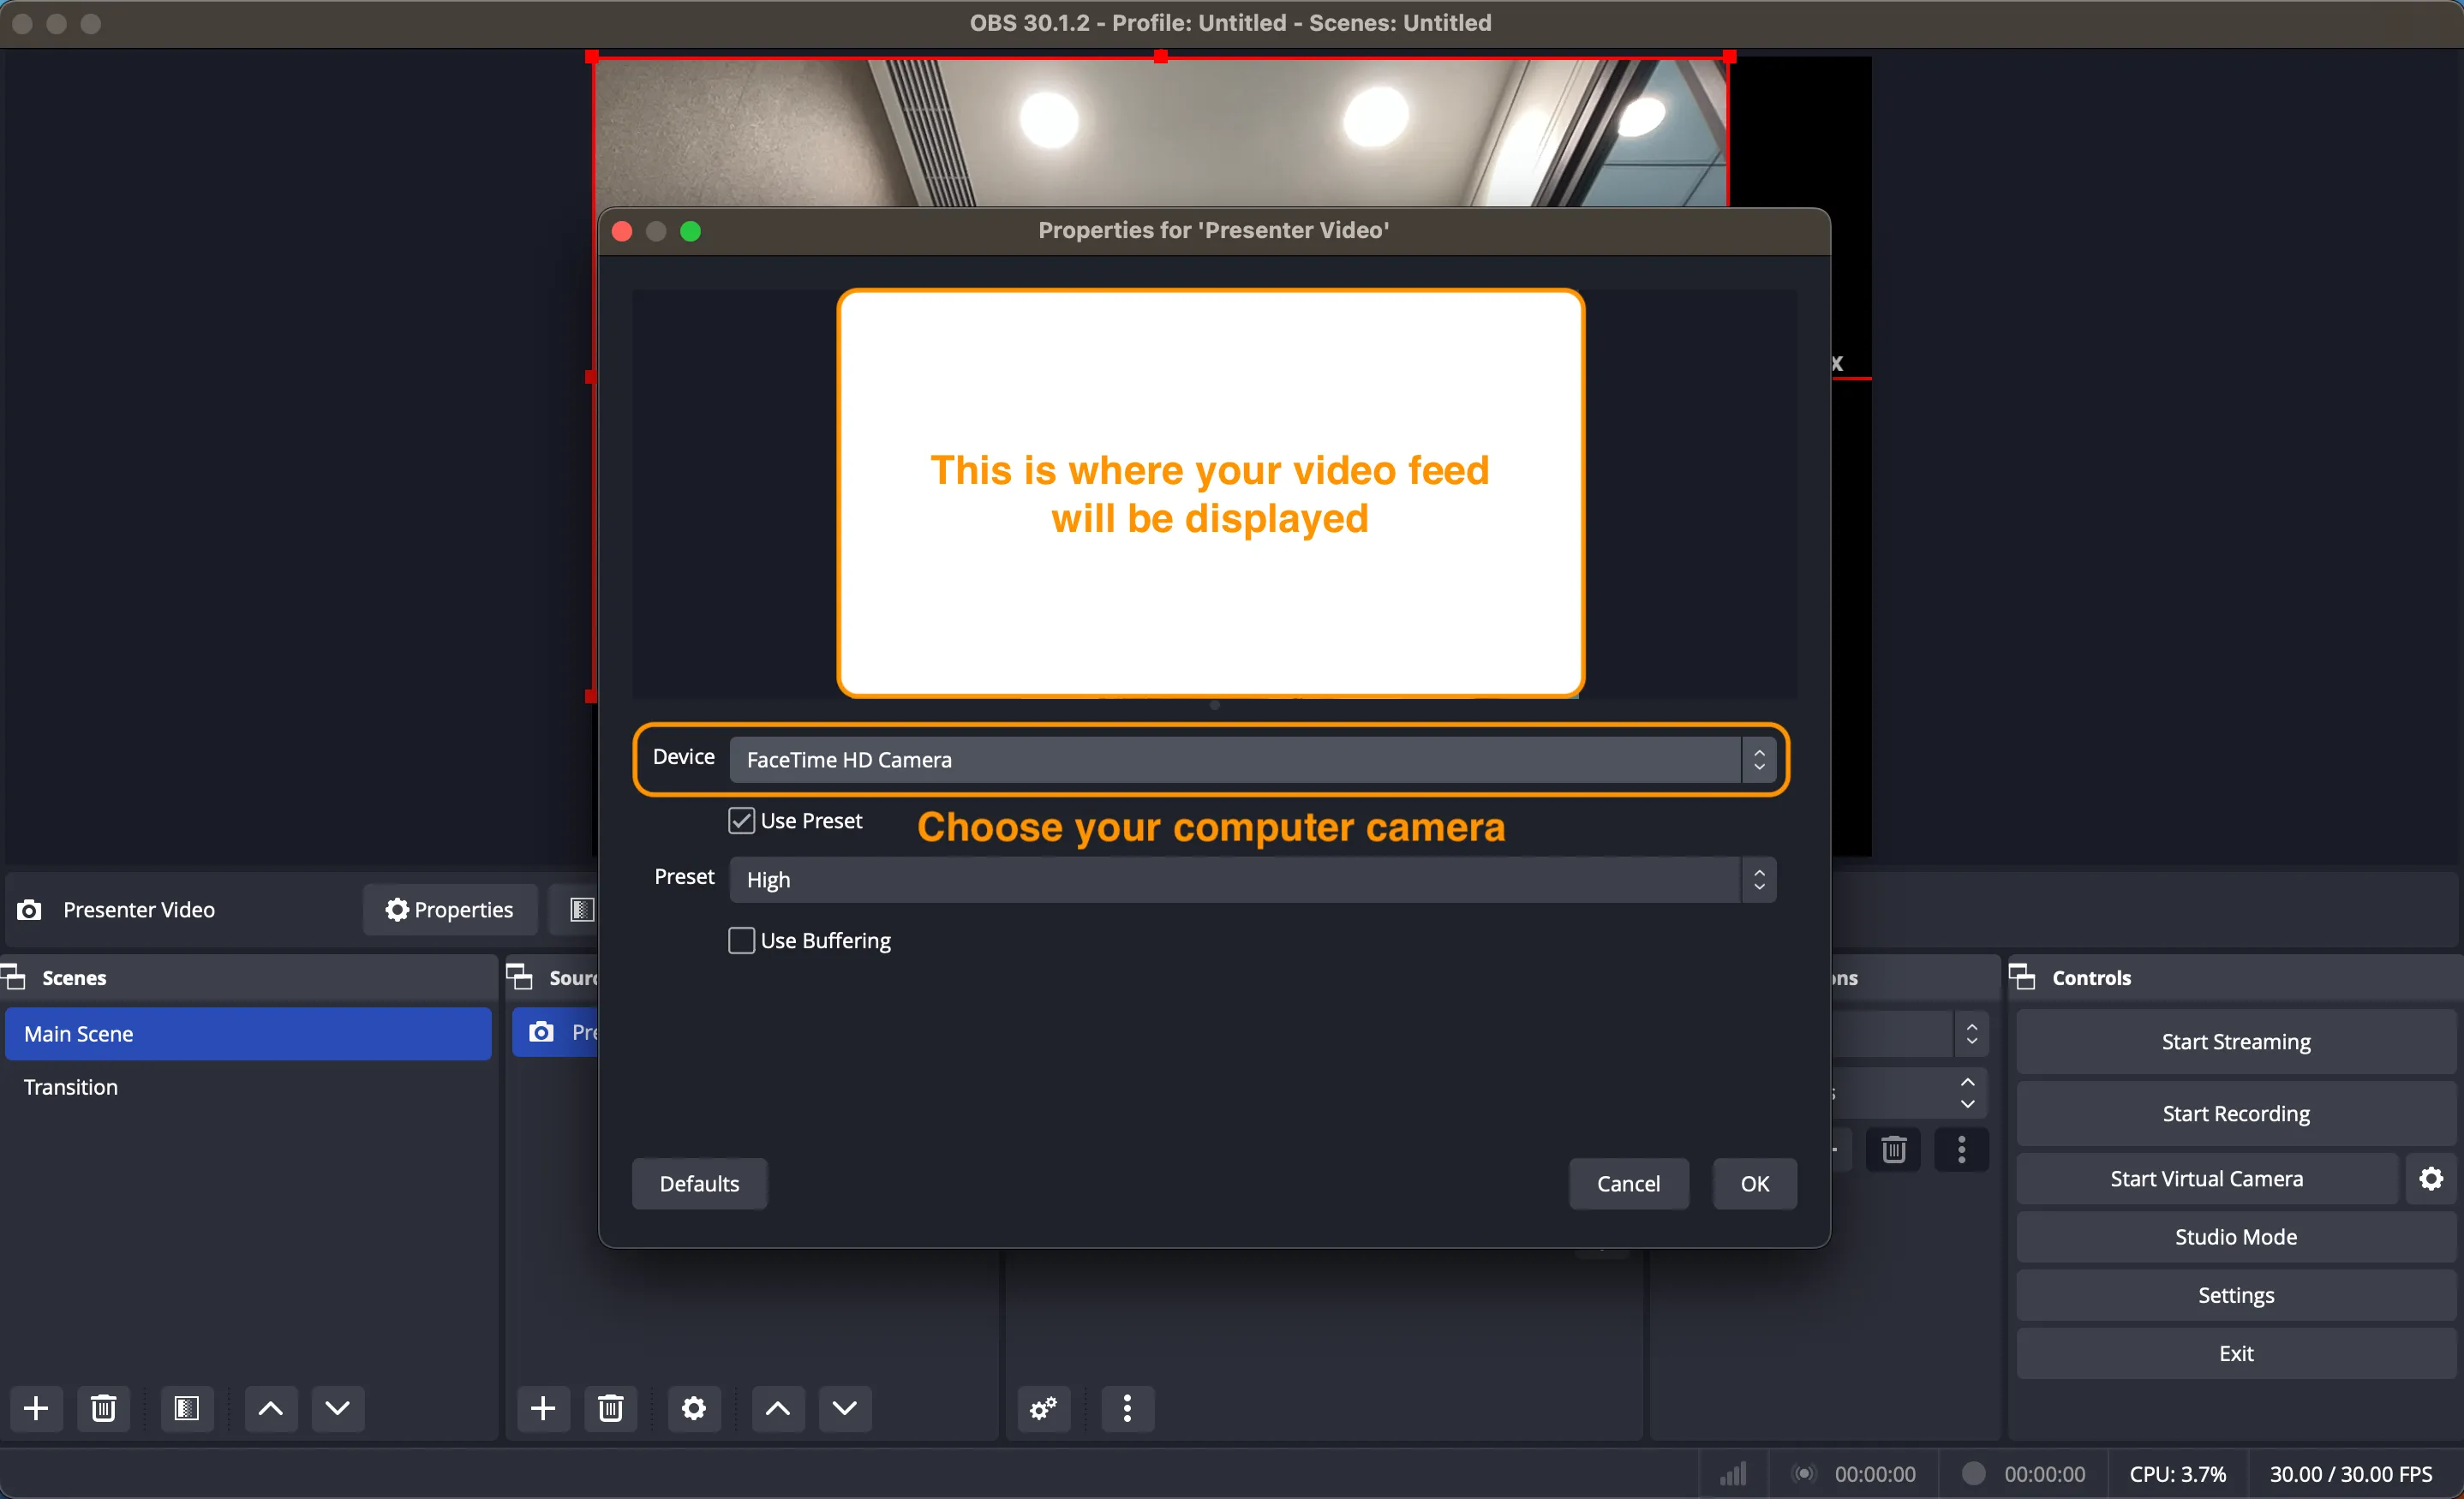
- Choose your computer's camera, and confirm it’s displayed correctly in the upper window (if not, check if OBS is authorized to use the camera correctly or if the correct camera is selected).
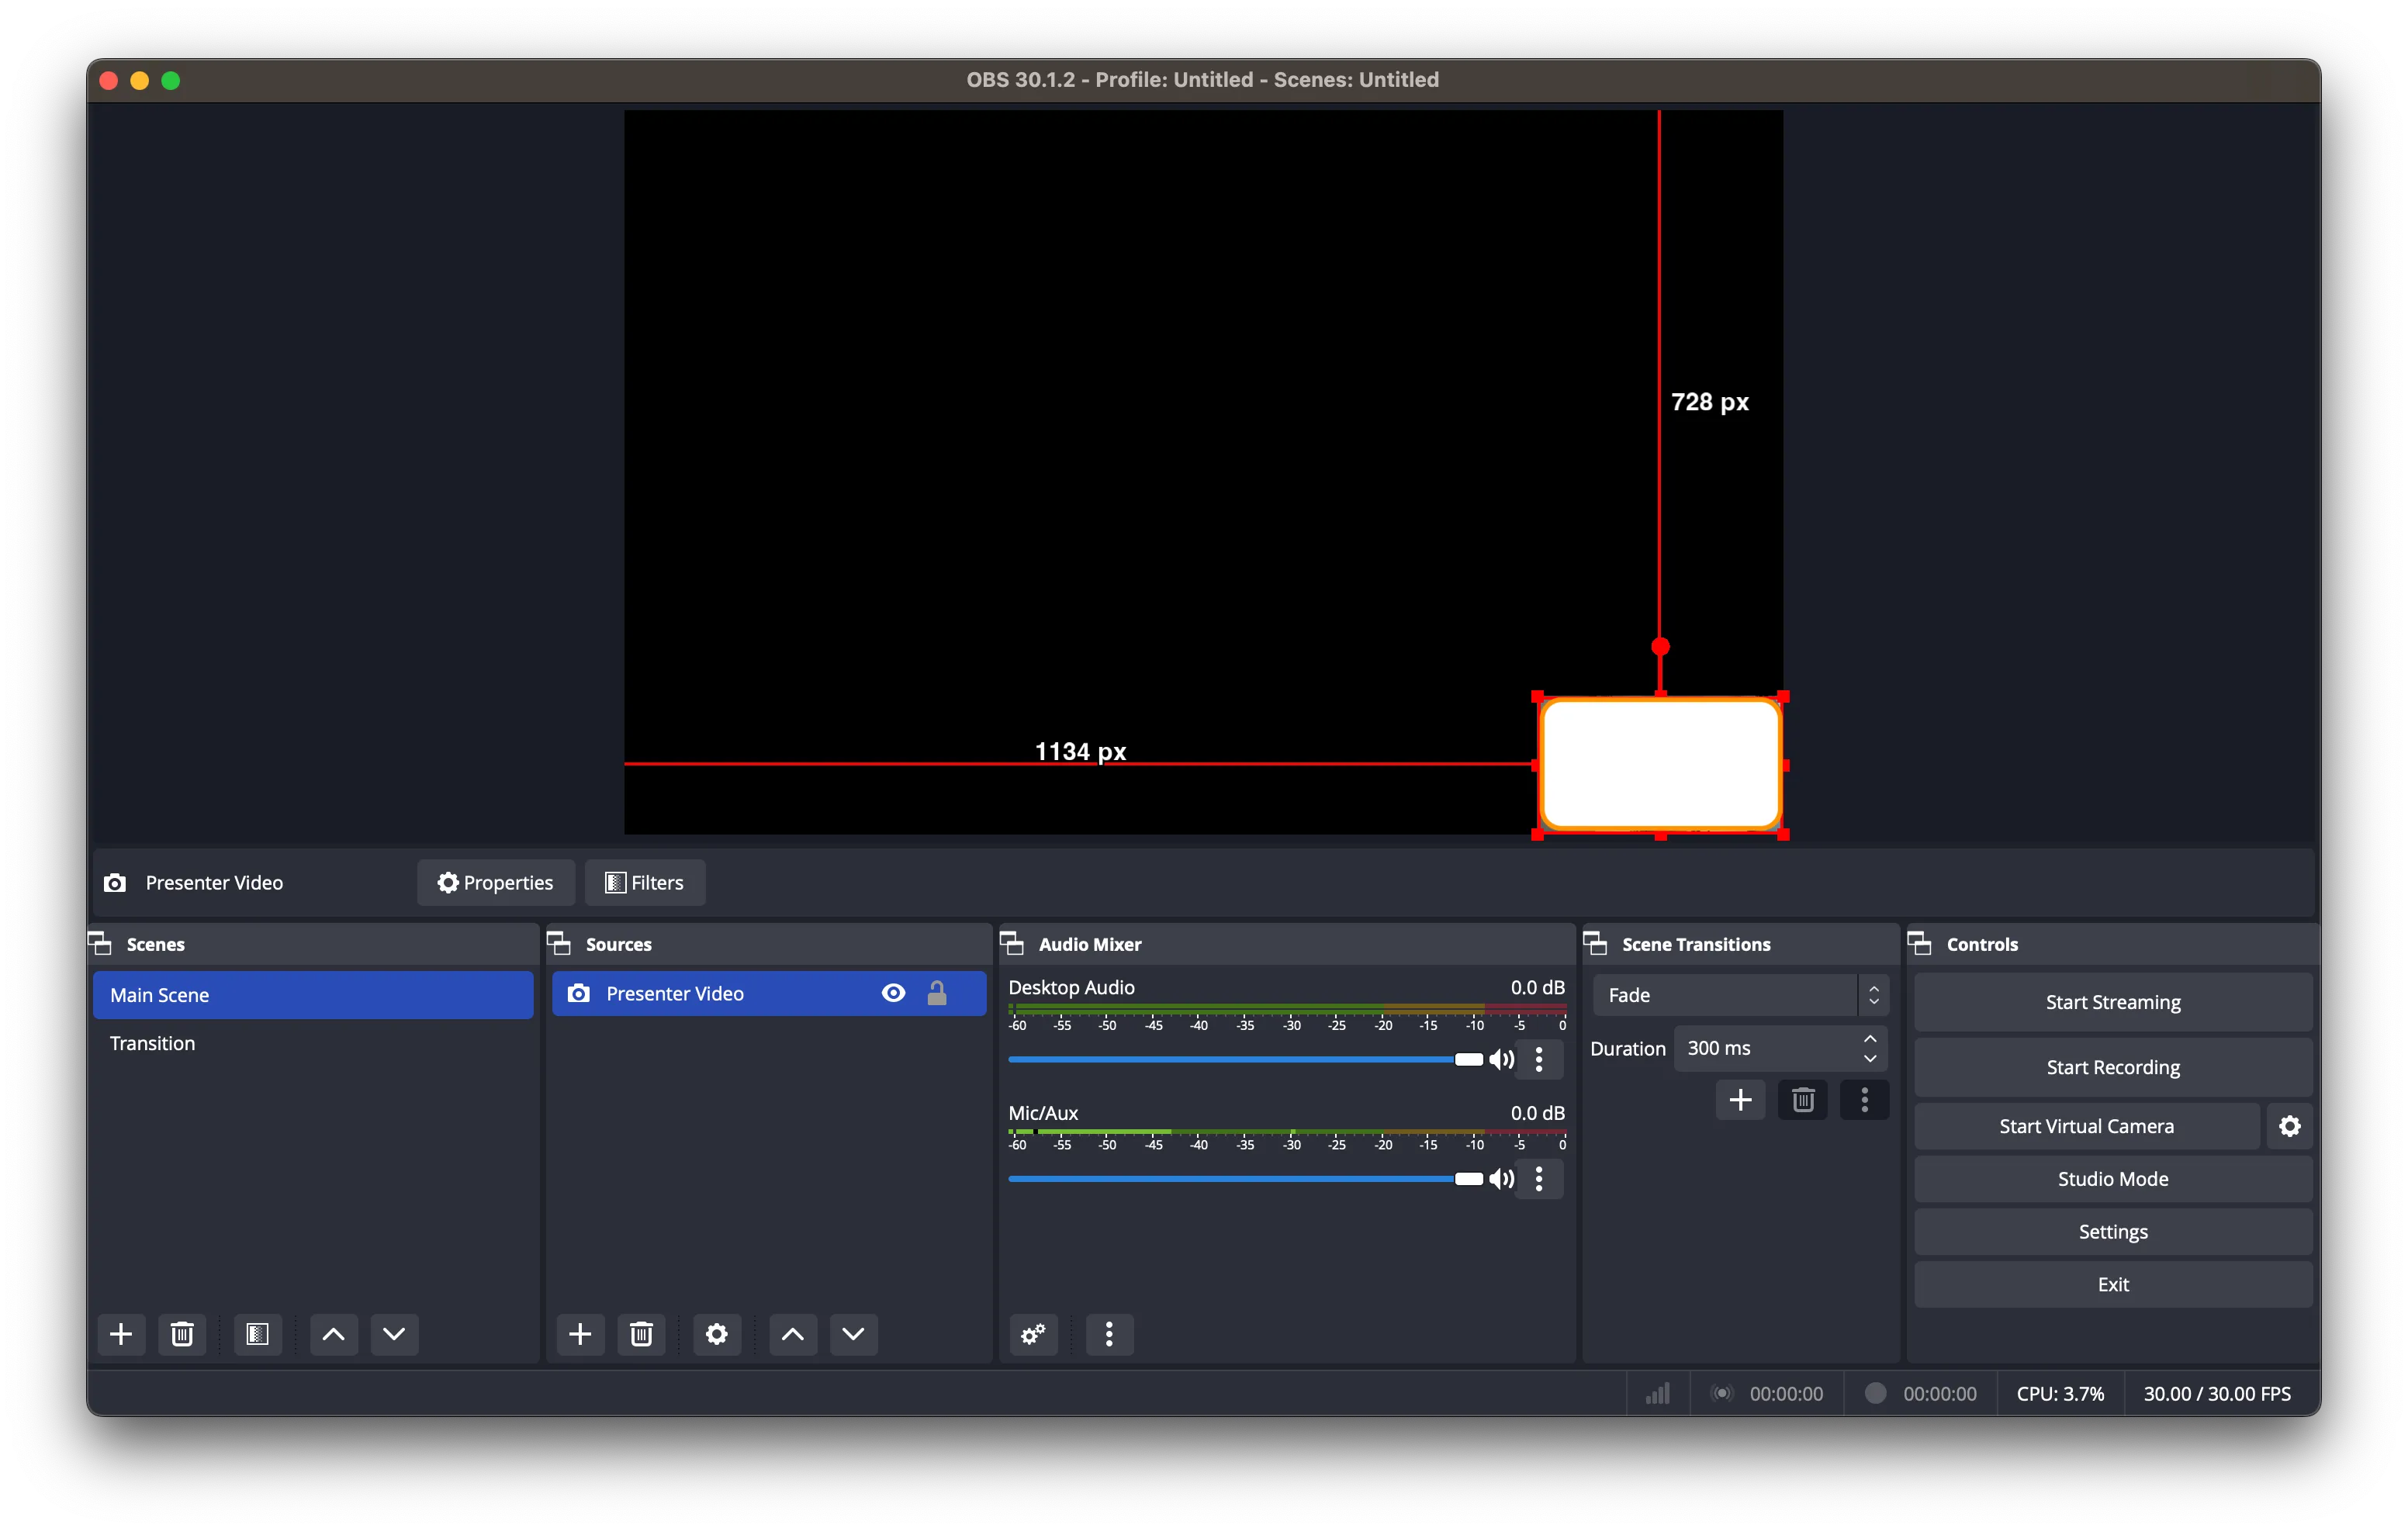
- Adjust the size and display position of the video through the red box.
Step 4: Set up the Slide
Now that the video part is set up, let’s move to the slides.
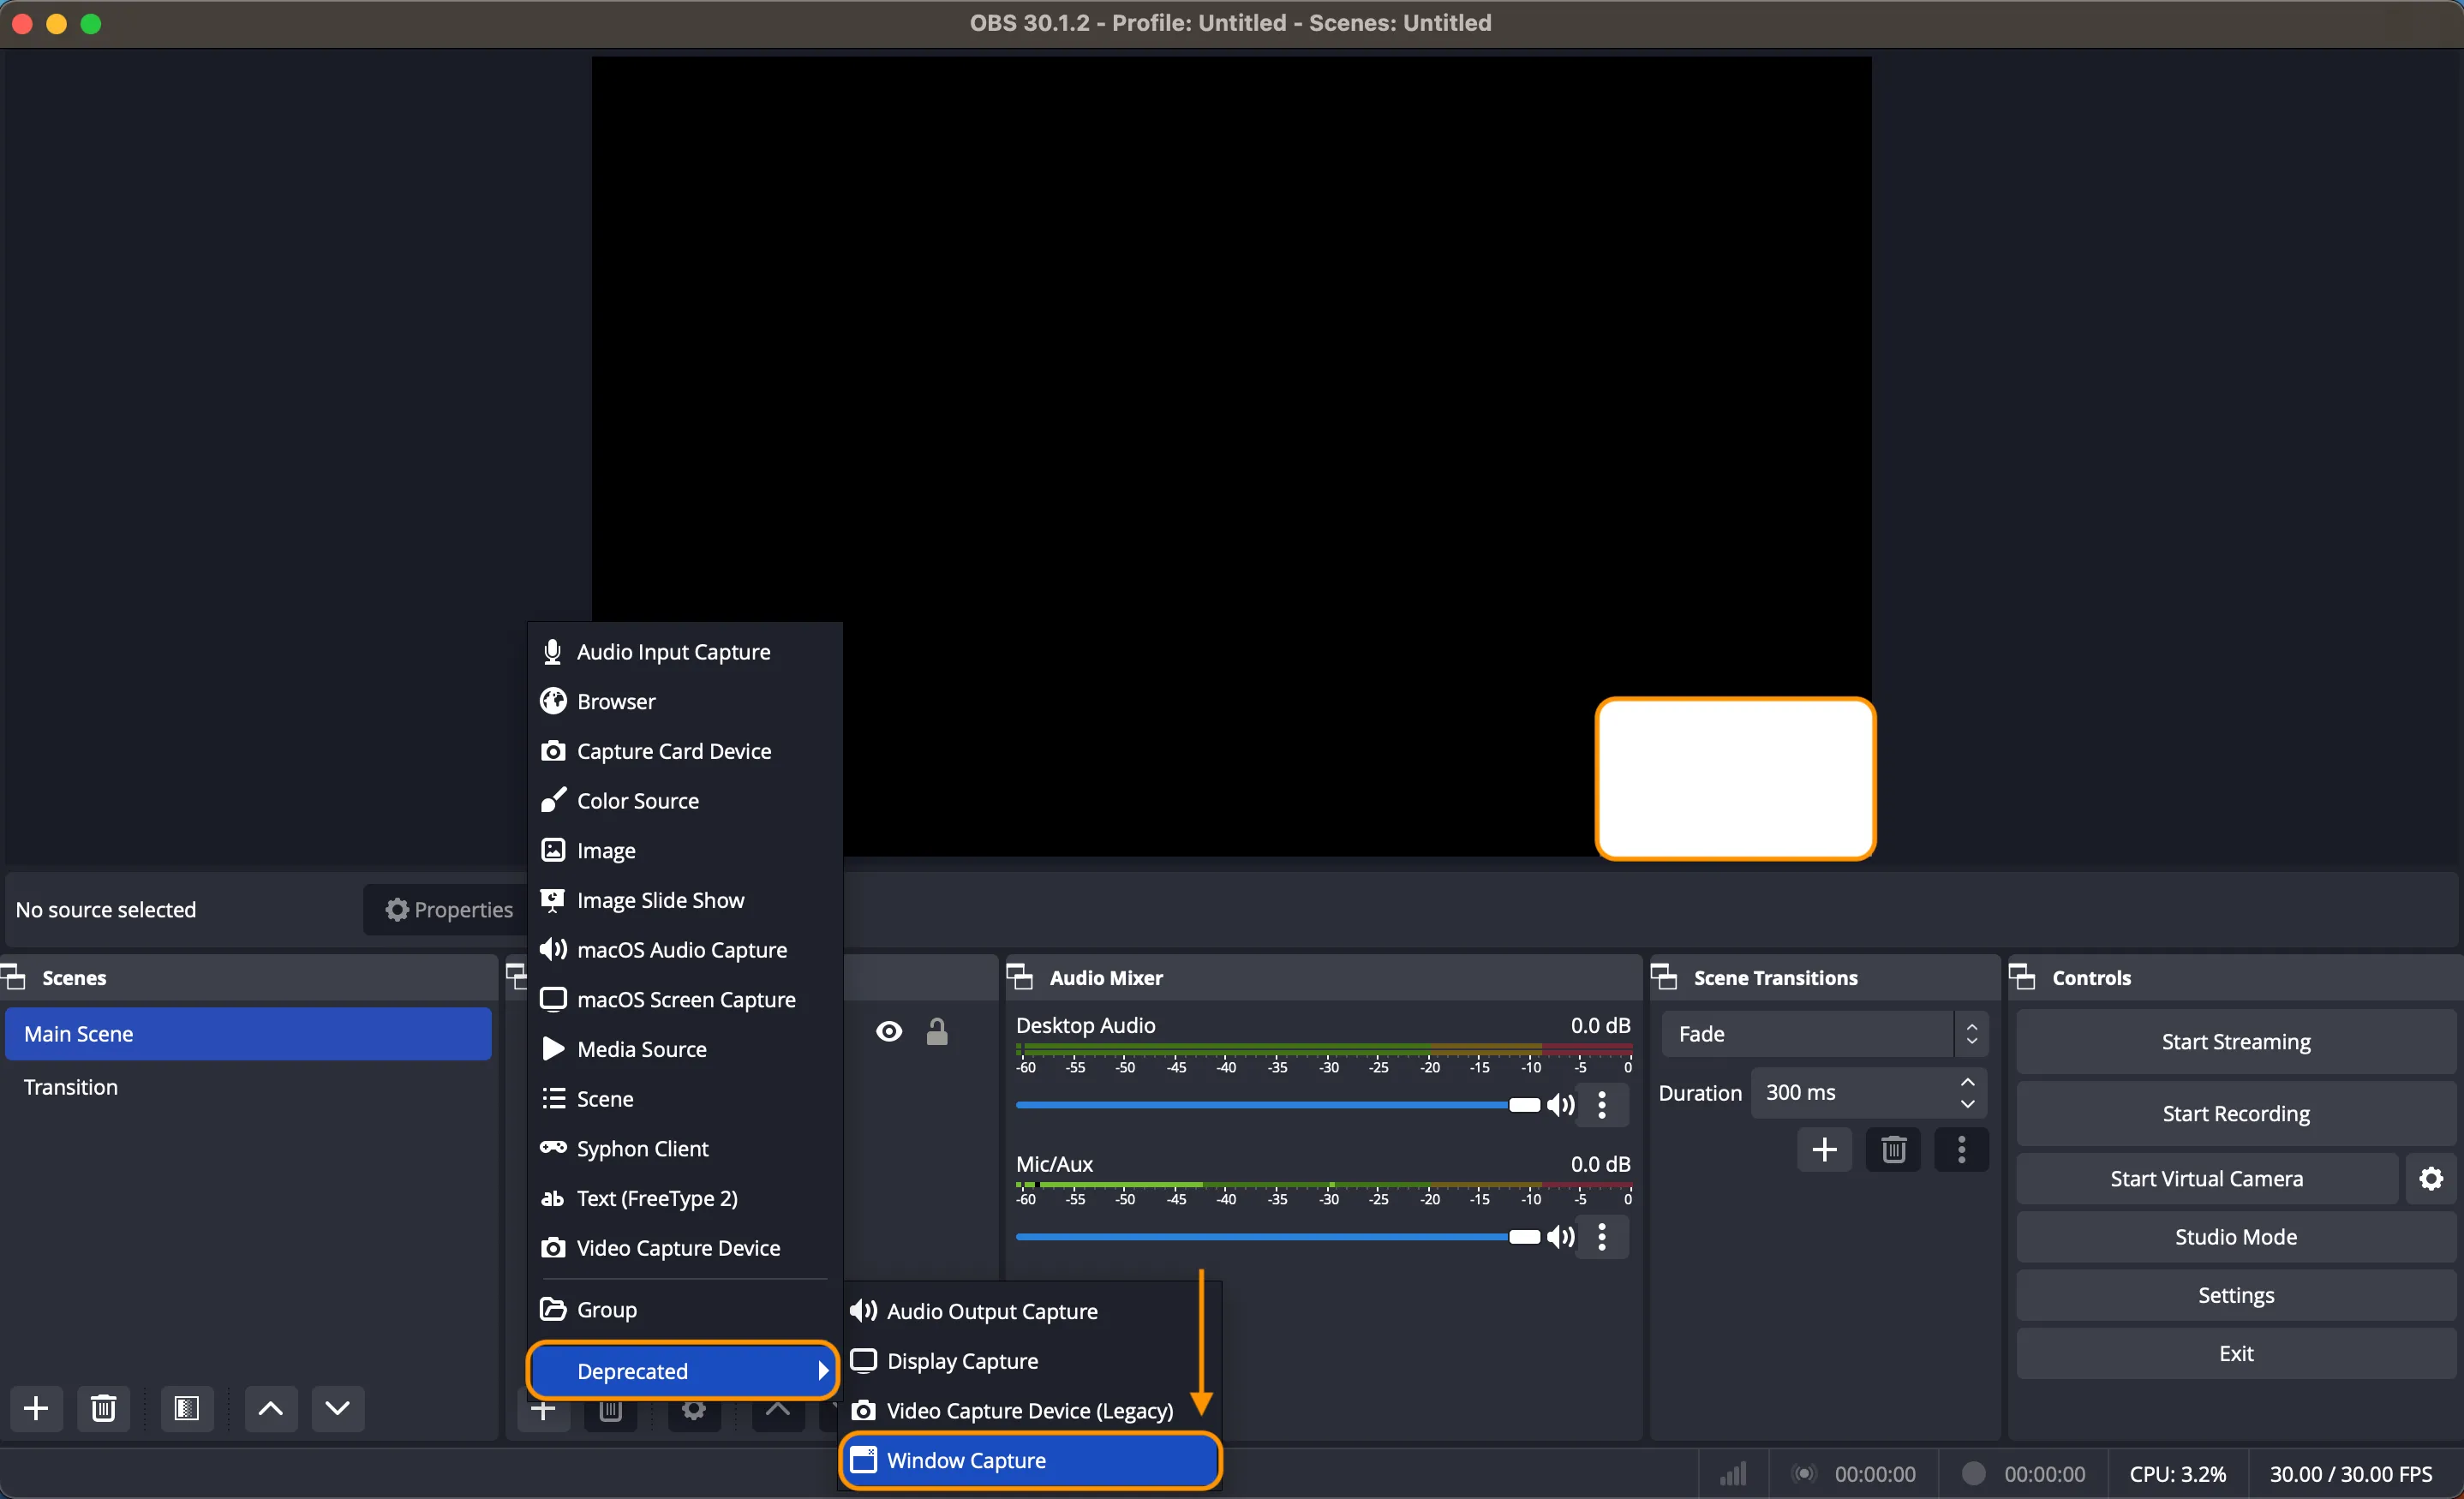
- First, open the slide file (or any application you want to share) on your computer. Click "+" in the "Sources," select "Window Capture," choose "Create New Source," and name it "Slide" or another name of your choice.
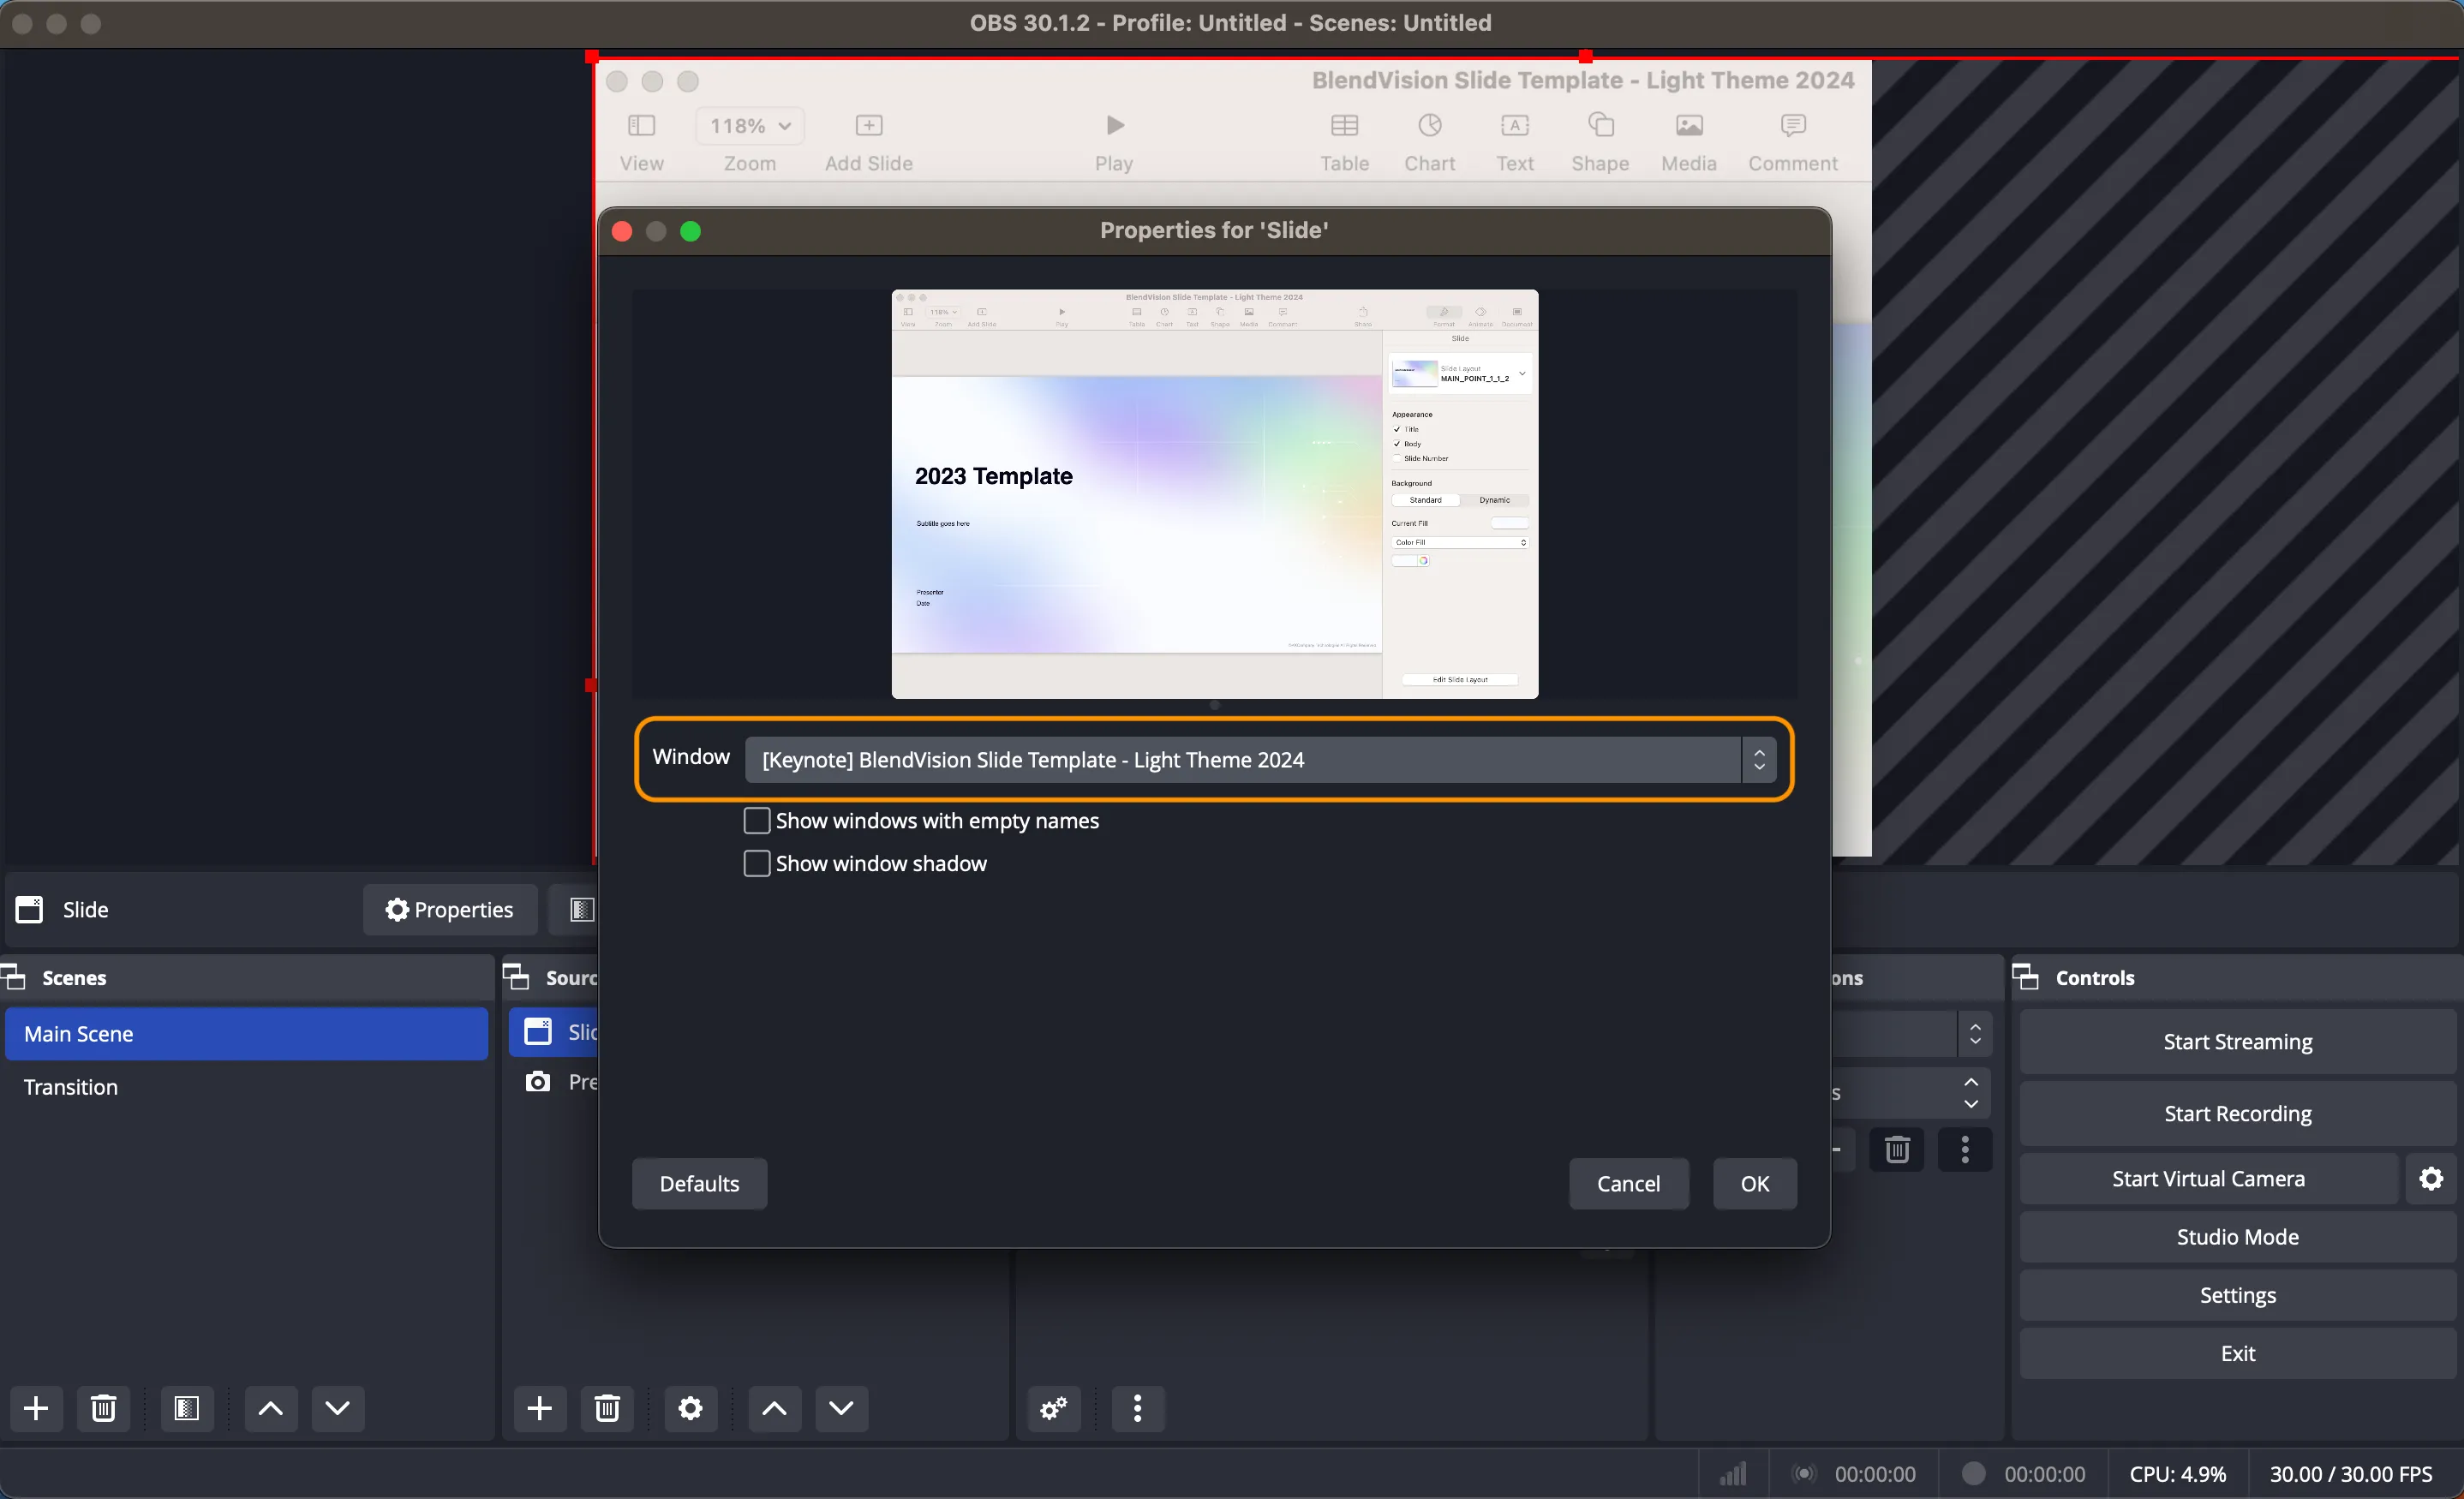
- Choose the slide or application window you just opened, and confirm it is displayed correctly in the upper window, then click "OK."
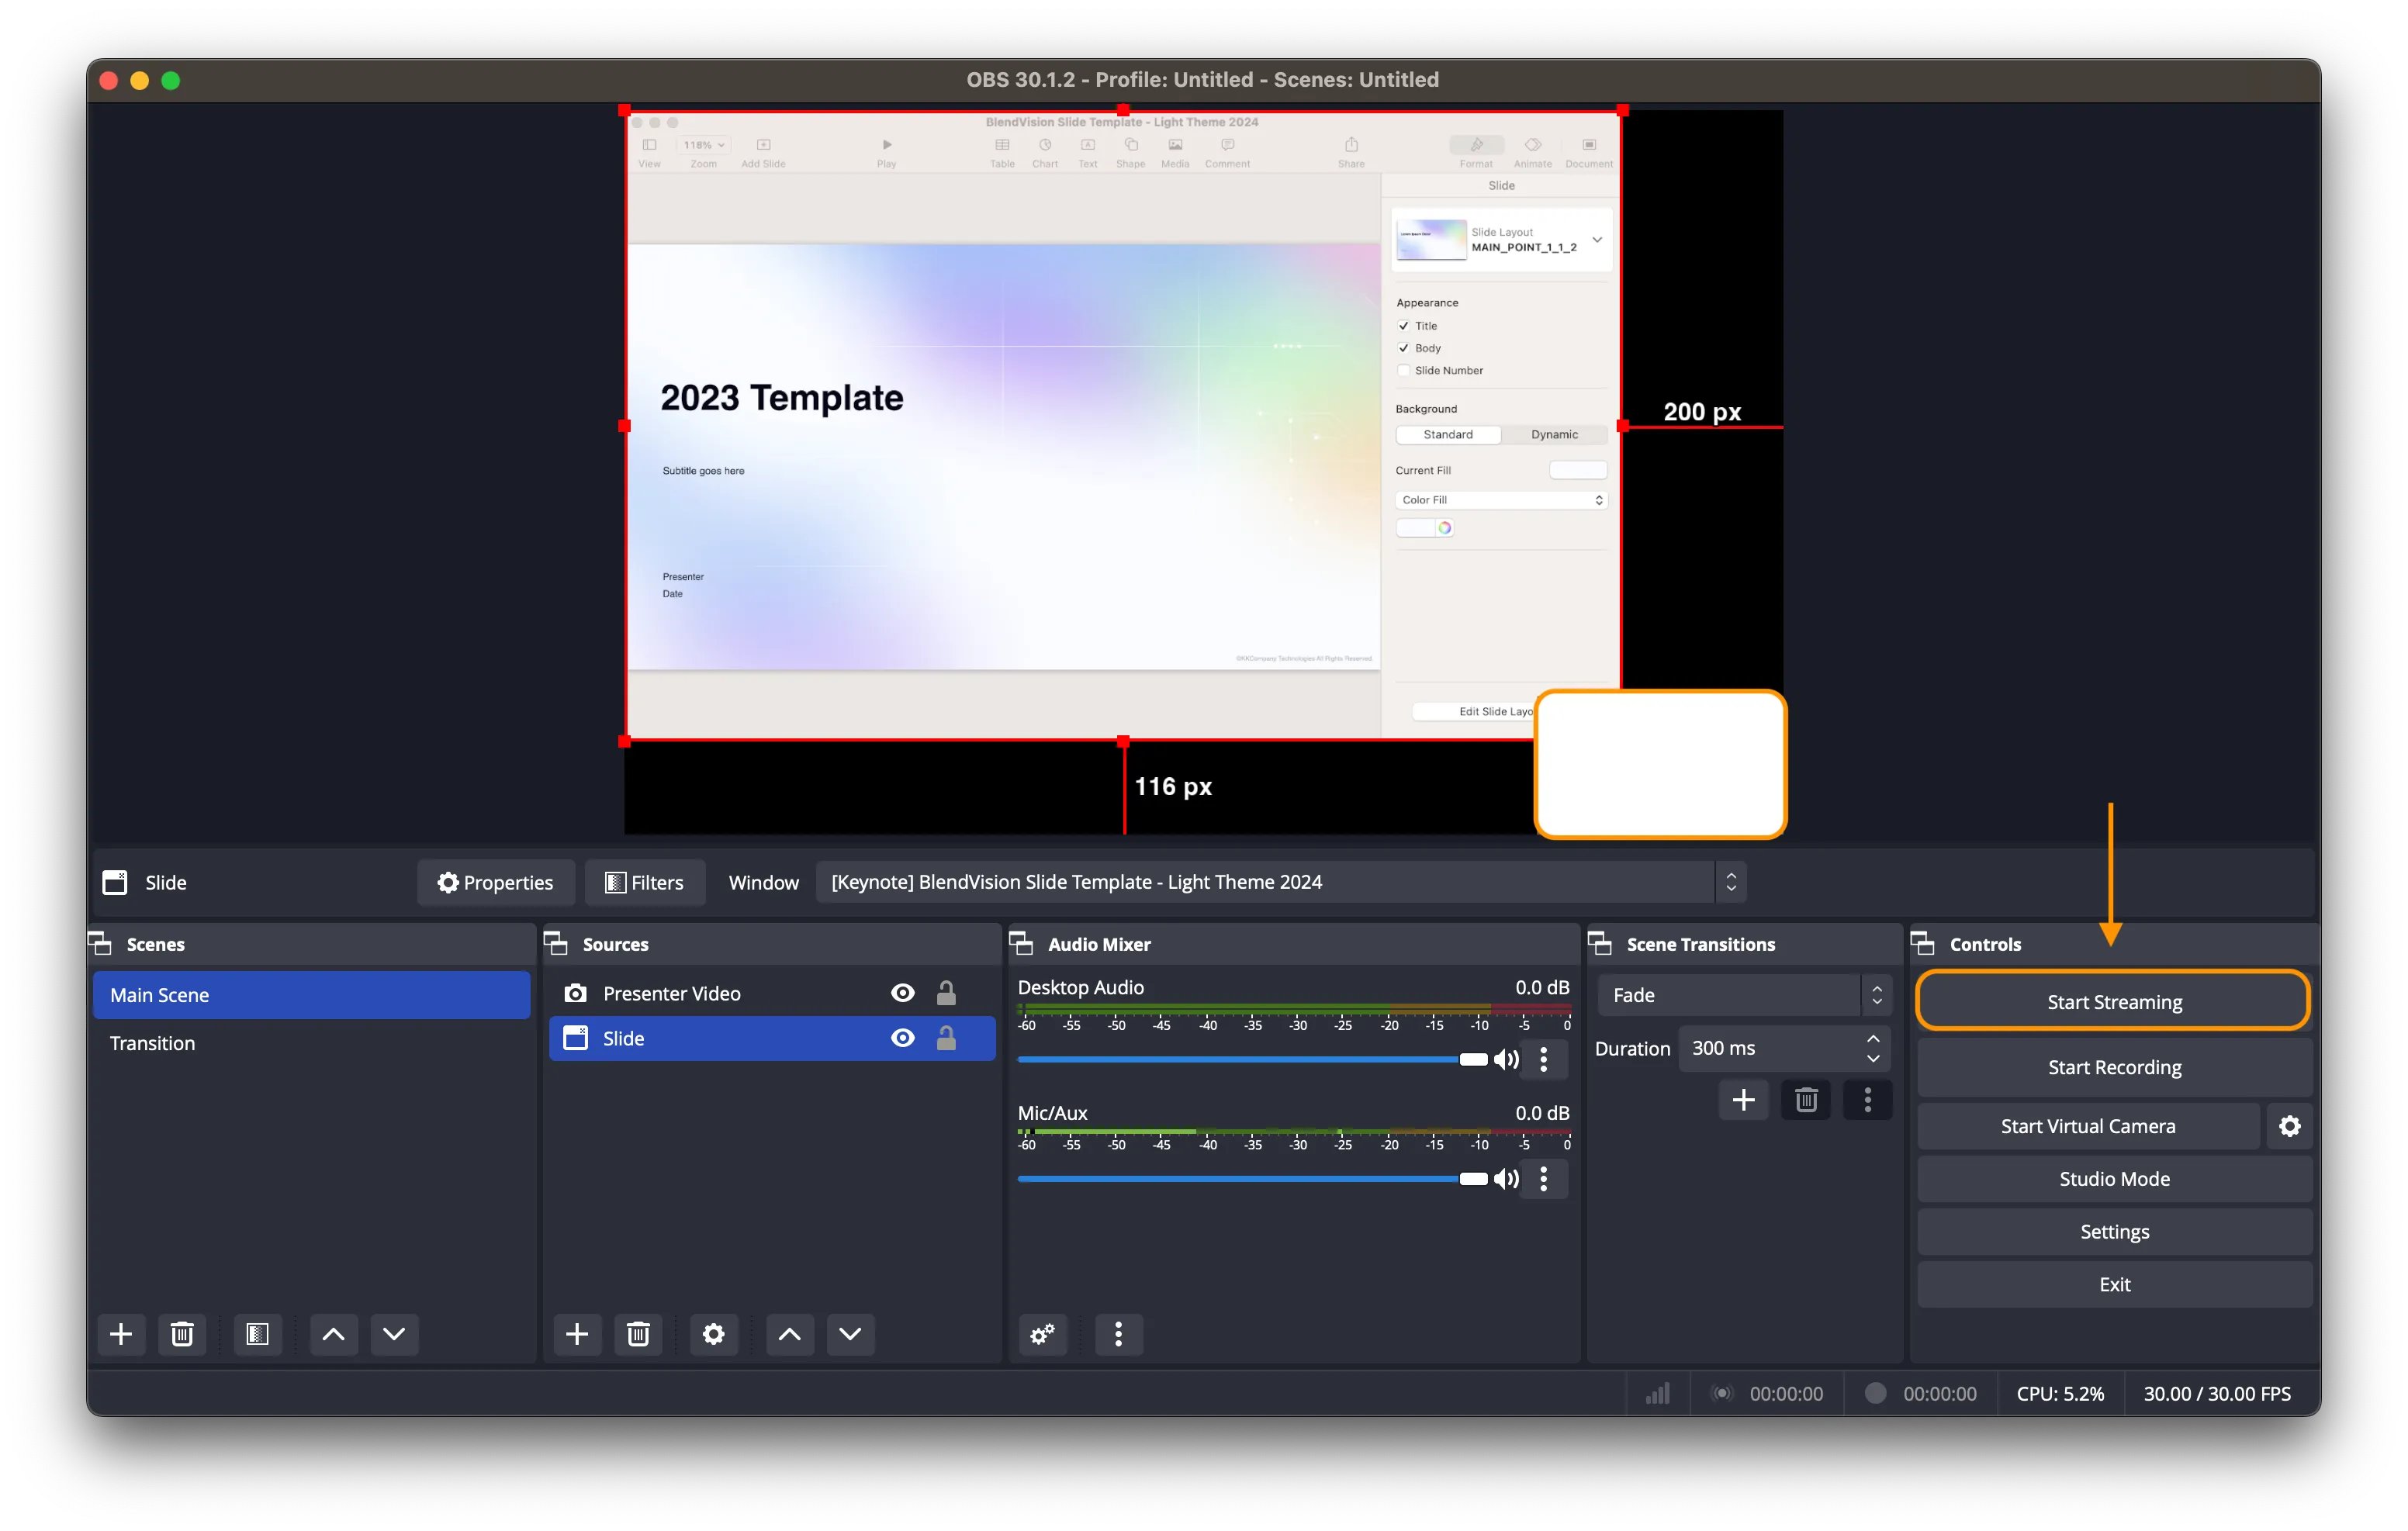
- Adjust the size and display position through the red box (if you want the video camera to be on top, right-click on the video camera box in the preview window and choose "Order -> Move to Top").

- At this point, you have prepared the materials before the live broadcast. When you want to transition, click "Transition;" when you want to officially broadcast, click "Main Scene," and directly operate the slide playback through the slide playback software to easily control the content displayed during the live broadcast.
— Setting Up the Live Streaming —
Stream the configured live broadcast screen to any platform. BlendVision One offers features like chat rooms, private live rooms, and low latency, making it easy to achieve your desired live room functions. After the broadcast ends, you can save the content as a video for future use. Whether your broadcast is public, private, or paid, BlendVision One is an easy-to-use platform. Here’s how to set up a live stream using BlendVision One.
Step 1: Add a Live Stream
- Refer to the following two articles on how to open a live channel on BlendVision One. If you need to stream to other live platforms, refer to the instructions on each platform.some text
Step 2: Obtain "RTMP Link" and "Stream Key"
- After adding a live event on BlendVision One, you can obtain the "RTMP Link" and "Stream Key" through the methods introduced in the following article.some text
Step 3: Stream to BlendVision One through OBS
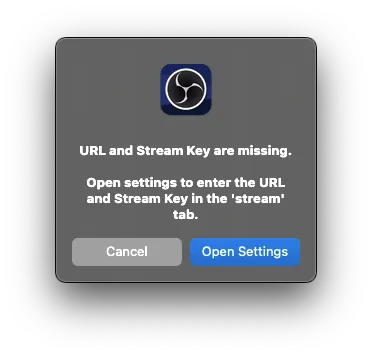
- Click "Start Streaming" in the control panel, then click "Open Settings."
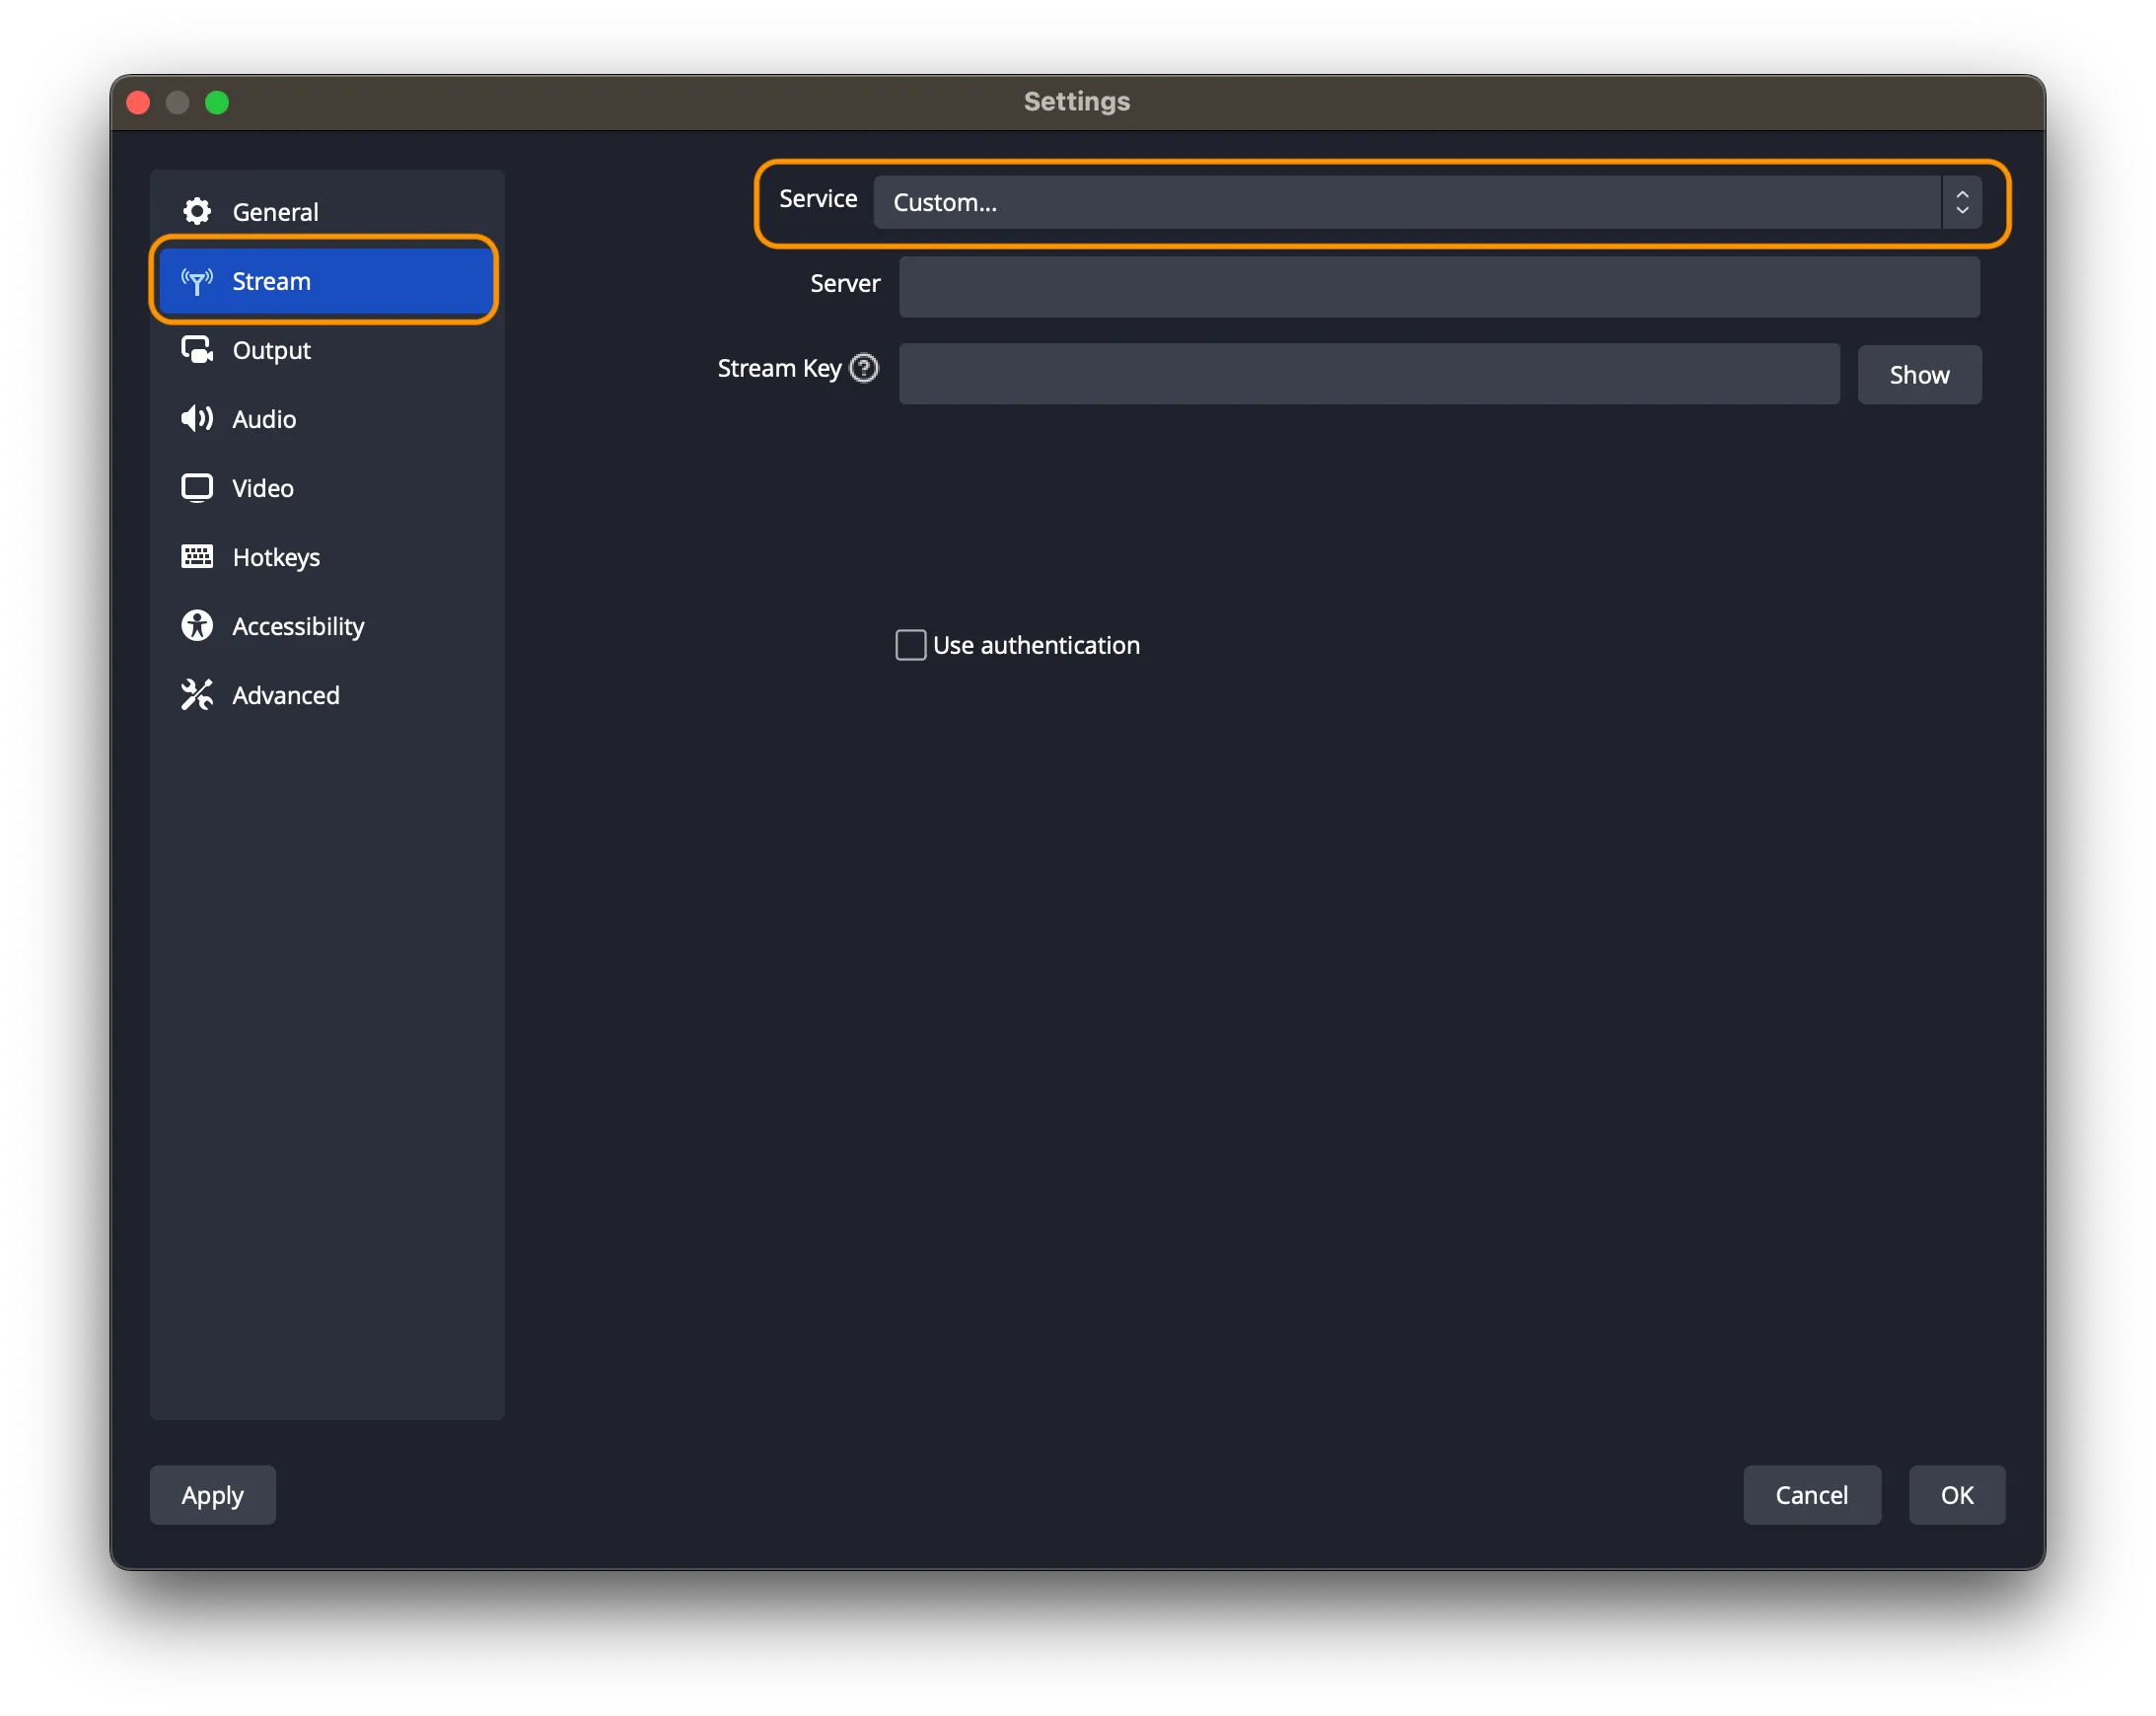
- Click "Stream," and choose "Custom" in the service.
- Enter the "RTMP Link" and "Stream Key" obtained in Step 2.
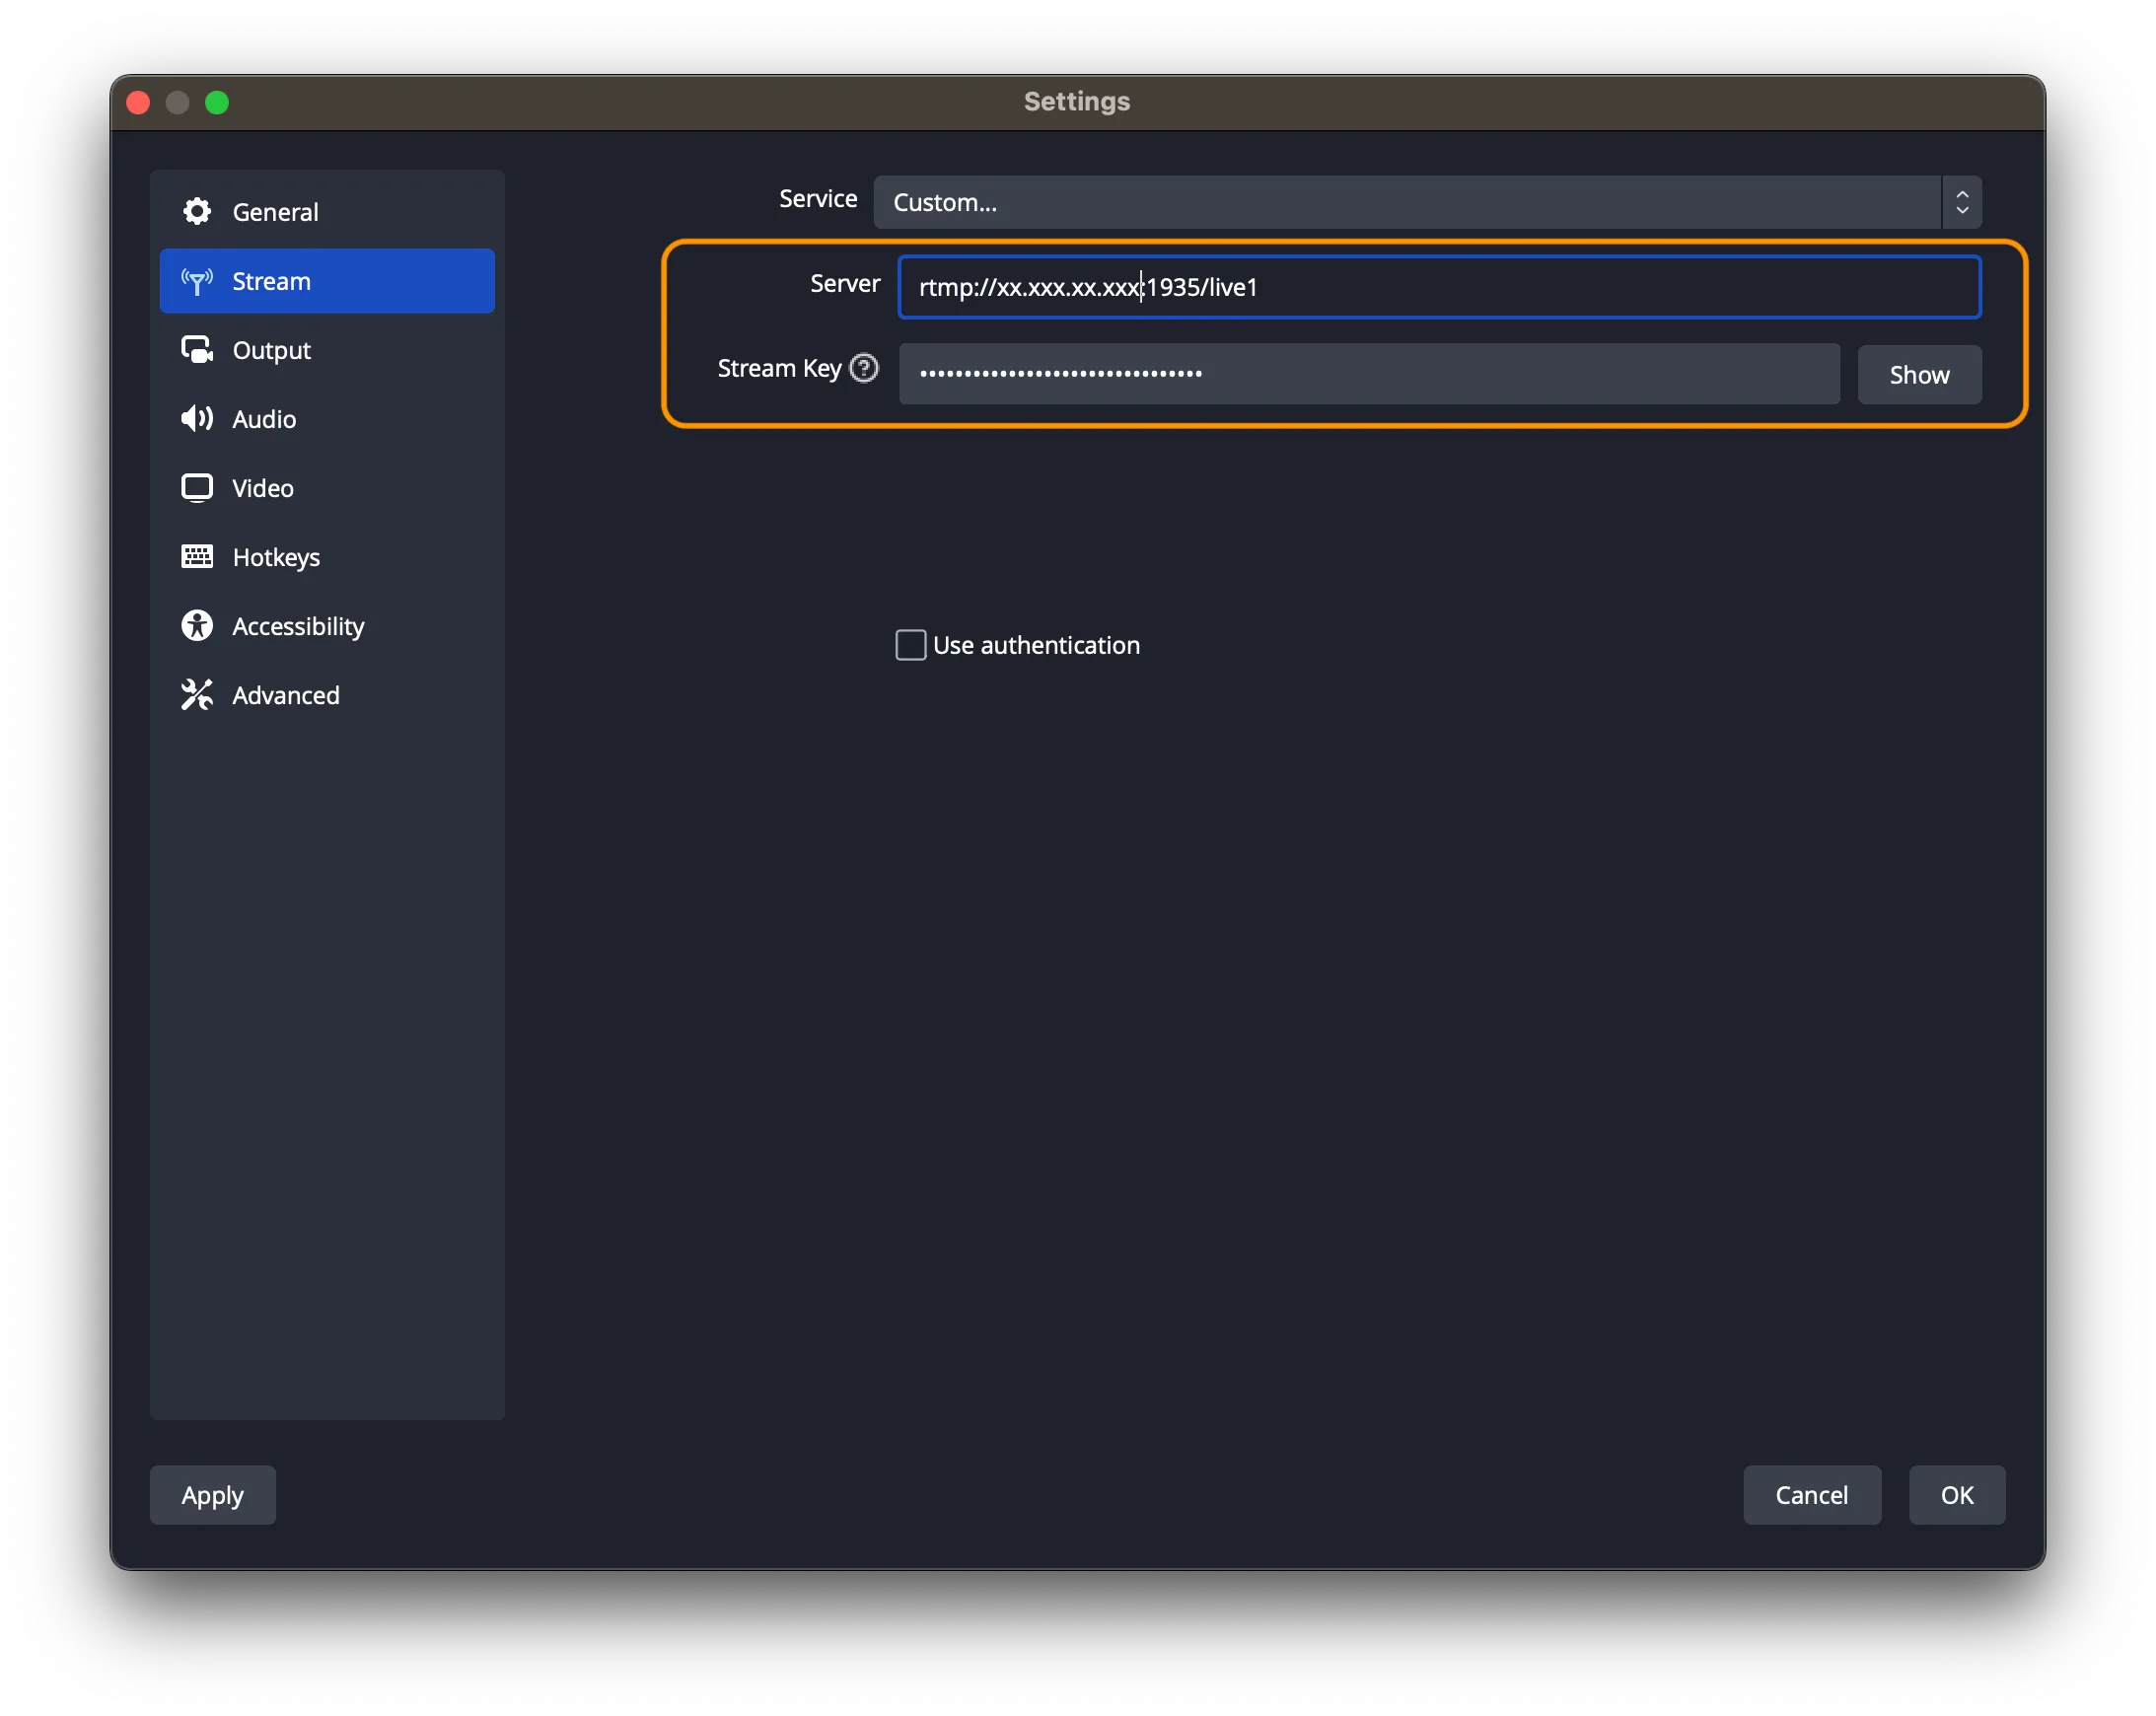
- Click "OK", then click "Start Streaming" again.
- At this point, you should have started streaming to the desired platform. Is it simpler than you thought?
Creating More Advanced Live Streaming Content
Live streaming is a complex field. While basic streaming can be achieved by following this guide, there are endless ways to enhance your stream quality. Here are some key areas worth exploring:
- Sources and Scenes: Mastering the management of a variety of sources and scenes can make your live stream more professional and engaging.
- Audio Settings: Properly configuring audio sources, mixing, and filters ensures good and clear sound quality.
- Interaction and Management: Enhancing interactivity and audience engagement, effectively managing scenes and transitions for a smoother streaming experience.
BlendVision One offers a comprehensive streaming solution with full interactive capabilities and live streaming services that significantly outperform industry-standard low latency, making interactions much more immediate. Moreover, BlendVision provides expert advice and technical support, helping businesses overcome technical hurdles and execute complex live streaming scenarios.

Get Started Today.
Fill in the form and one of our consultants will help you shape your video strategy.


